Thursday, January 30, 2014

Easy Chicken Cordon Bleu

Today’s recipe post is one of my favorite go to recipes. It literally takes less than 10 minutes to prep and cooks in the slow cooker in as little as 4 hours.

When my hubby and I were first married I was determined to celebrate every milestone. When it came time for our 6 month anniversary I decided I had to make something special and that’s when I found this recipe. It was easy, delicious, and smelled SO good while it was cooking!

Over the years I've tweaked it and made it my own. I love sharing it with family, friends, and random people on the internet looking for easy and delicious dinners.

Here’s the ingredients you’ll need:

For this meal I decided to use salt, pepper, garlic, and paprika for the seasonings. One of the reasons I love this recipe is that it’s so easy to customize! You can add Italian seasoning, lemon pepper, basil, hot paprika, etc. This time I decided to keep it pretty simple, but feel free to put your own spin on it.

First, mix the milk and soup in another bowl. If you’re feeling lazy you can just pour them into the slow cooker and mix them there, it just changes the consistency of the sauce. Next, mix in your spices.

Pour in enough sauce to cover the bottom of the cooker then add chicken breasts. I usually cut them in half width-wise so they’re thinner and cook more evenly.

 Layer ham on top of chicken. I used lunch meat, but I've also done it with ham  leftover from a Christmas dinner, and it worked just fine.

Next, layer on the Swiss cheese. I use pre-sliced, but, you can also cut your own if you’d like.
Pour the rest of the sauce on.

Put the lid on the slow cooker, set it to low, and set it for at least 4 hours.

 When I made this batch it cooked for 6 hours and all that did was make it so that it was even more fall apart yummy.

See? Yummy, easy, and mouth-wateringly good!
The original recipe does call for stuffing, but I hate the taste and texture of soggy bread, so I never used that… Feel free to give it a try if you’d like! I like to serve this with pasta and use the sauce as a pasta sauce. It's also really good with gnocchi (recipe coming soon). What would you serve it with? Feel free to share in the comments!

Slow Cooker Chicken Cordon Bleu:

Ingredients:

1 Can Condensed Chicken Soup
3/4 c milk
1 tsp Paprika
2 tsp garlic (optional)
Salt and Pepper to taste
3-4 chicken breasts
6 slices ham
6 slices Swiss cheese

Prep:

Mix together the soup, milk,paprika, salt, pepper, and garlic.

Steps:

Pour sauce mix to cover the bottom. Place  Chicken on top. Layer enough ham to cover the chicken, the cover that with cheese. Pour the rest of the sauce over the top.
Set slow cooker to 'low' and set timer to at least 4 hours.


I hope you enjoy!

Wednesday, January 29, 2014

Polarity Bear Tours the Zoo Review

About the Book:


Polarity Bear Tours the Zoo A Central Park Adventure is about a polar bear who feels that she has nothing to do. She wishes she wasn't trapped in her metal cage and so she escapes. The poem takes you through her adventures as she explores the zoo. She encounters sea lions, monkeys, the Delacorte Clock, and the carousel. Polarity discovers that being outside her cage isn't exactly what she pictured it would be like, and eventually she heads back to her cage. She ends up getting a really big surprise after she returns when a zookeeper announces that her cage will be replaced with a more natural environment to make her place feel even more like home.

Our thoughts:

We love reading at our house so Monkey was really excited to see a brand new book to read. Monkey absolutely loves books that have poems and rhymes so this book was huge hit with him. The age recommendation for this book is 3 - 8 years old. Even though Monkey is not quite 3 years old, he sat still for me to read the entire book. After we were done, he had fun looking through the book at the beautiful illustrations.


I was really impressed with poem lyrics and the illustrations. It was an enjoyable book for me to read, and I feel that this book is definitely one that would be great to have in your book collection. This was a great book to read during our letter "B" week because I got to teach about bears to my child. I will be reading this book over and over again with Monkey!


The following information was taken off of the polarity bear website:

Meet the Author:


 Sue de Cuevas has been telling children's stories all her life, but this is the first one she wrote down. As Sue Lonoff, she spent thrity years as a teacher and administrator at Harvard University, retiring in 2011. She also writes scholarly books and articles and is a specialist on the Brontë sisters.


Meet the Illustrator:


Wendy Rasmussen developed a passion for drawing people and animals as a child growing up in rural New Jersey. After graduating from Drew University with a B.A. in biology and art, she worked as an art director in the advertising industry for 14 years. In 1989 she became a full-time freelance illustrator and established Mill Race Studio. She has illustrated over 25 books, most of which involve animals.

Buy It:

You can get Polarity Bear Tours the Zoo here. It is $17.95.


All opinions expressed in this post are mine.

Tuesday, January 28, 2014

$30 Starbucks Giftcard Giveaway Hosted By Coasahmom

Social sites are popping up left and right some are good and some are bad and some are good enough to really make the cut. The ones that get to stick around are the ones that offer something unique to their users. For example Memfy.com allows the user to achieve different aspects of the site; they may create posts pertaining to only special memories or create posts to keep their life straight and remember those important dates. By adding friends and family they are then allowed to share these memories and also learn of their friends and family’s memories as well. There are several different ways that the site itself can be used and to me that’s what completely makes it more unique than others. Because of this I personally believe that we could all benefit from Memfy.com in one way or another. When was that again? Here is some information from the site description: Memfy.com is designed to help you remember those important dates and events throughout your life. And not just the biggest milestones in your life, but particularly those little moments of joy, comedy and sadness that we all go through and usually get forgotten with time.   In honor of their amazing site and the readers at Coasahmom.com they are giving away a $30 Starbucks Giftcard to one lucky winner.
Enter below for your chance to win! So go check out Memfy.com and see what it can do for you and your memories. This looks like a creative way to highlight significant moments in your life with your friends and family.

This is a sponsored post and the opinions expressed here are not a reflection of our thoughts, and we didn't receive anything in return.

Dates: 1/28-2/28
Limited to the Continental US.
Sponsored by: Memfy.com
Hosted by: Confessions Of A Stay At Home Mom 
  a Rafflecopter giveaway   disclaimer    

"B" is for Butterflies!

For this week’s Calendar Day we’re focusing on the letter B!


I decided to take our learning on the road and we headed to the Butterfly Pavilion in Westminster, Colorado. There are literally B’s everywhere there!


On the way, BooBoo and I talked about what sound the letter B makes and I helped him come up with words that started with it. To be honest, he’s barely over 2, so he didn’t seem to care that much, but he was asking to see the “Bees!” as soon as we walked inside.


 I should explain that the pavilion is only one small part of this building. It’s more of an Invertebrate Zoo. There a bees, jellyfish, arachnids, starfish, beetles, and numerous other creepy crawlies.

While we walked through I pointed out each thing that started with B:

B is for Beautiful! (He loves spiders right now *shudder*)

B is for Bug.

Busy Bees!


B is for Banded Shrimp.


After we finished seeing the rest of the invertebrates it was time for the Butterflies!


BooBoo loved seeing the butterflies. He had fun making the Buh Buh sound as he ran around. We even found a "Buh" bench!


We enjoyed our alphabet adventure! What adventures have you had while teaching your kids? Tune in next week for Christina's lesson on C!


Dry Erase Activity Books

Like most kids, my oldest boy has tons of energy. It is hard to keep him still because his curiosity drives him to explore every nook and cranny. So you can only imagine what it is like to try to have him sit reverently at church and not make too big of a ruckus. I have asked myself this question frequently: What will quietly entertain my son at church? And, that is when I saw found this great post about dry erase activity books. Credit must be given to Hannah because she shared this post on her Facebook page.


The post does an excellent job walking you through on how to make the books. The best part about this post is that she provides her copies of the books she made for her kiddos! This really made me excited because free printables helps save so much time.


Step 1:

Download the file for the activity book. Once the file was downloaded, I then went through the pages and kept the pages I liked, added some pages I wanted, and deleted the pages I didn't want. Like the blog post mentioned, there was plenty of pages to make three dry erase activity books. One thing I want to point out is to make sure each picture fits into the column or it will be cut off during the printing process.

Step 2:

Cut the printed pages in half and glue them together. I took them over to the copy center to get them laminated. I'm really blessed since I have a copy center practically next door to me.

Step 3:

Cut the laminated pages and hole punch. I decided to only do two hole punches because it was easier. My husband has an adjustable 3-hole punch made by Stockwell where you can adjust the punch holes. I adjusted them far enough in so the rings wouldn't go around the corner of the books. It was approximately 1.25 to 1.5 inches from the edges. The hole punching process was incredibly fast because I just had to insert the laminated paper to the end of the hole puncher and press down.


Step 4:
I assembled the activity books into themes. My themes were: religion, alphabet and numbers, and colors and trucks.


Do they really work?

Yes! The dry erase crayons is easily removed by a cloth. See below for the proof:


Overall thoughts:
I have to admit that I was probably more excited about these books than Monkey. As soon as I had them assembled, I had to test them out. It was so much fun coloring on them and then erasing what I colored. I am quite pleased to say that they were a big success in church. Monkey colored on them for more than half of the Sacrament meeting. I would totally recommend doing these books for your kiddos and even for yourself.

Friday, January 24, 2014

Holy cow I'm a Mom!


*Disclaimer* Bodily functions ahead…

I had a “Holy cow I’m such a mom!” moment today. BooBoo Bear was taking a bath and when I came in to check on him (I was in the next room listening carefully to every sound he made) he looked up at me and said “Wipe Mama? Wipe?” I looked down in the tub, and sure enough, a piece of poop sat at the bottom.  I didn’t even blink, I simply sighed and scooped it out, then proceeded to drain out the affected water and put new water in.

My non-reaction caused me to reflect- 2 years ago BooBoo Bear was sitting in his baby tub in our tiny kitchen. He was having a blast and splashing around when he suddenly started crying. That’s when I looked down and saw the poop floating. I did not react well. “EWWW GROSS! OH YUCK! REALLY?!? Honey! Come and clean this for me!” Great bonding moment with my hubby, let me tell you.  Poor man.
Courtesy of: Jealous Turtle Photography

This line of thinking lead me to dwell on other moments of realization I’ve had in my life’s journey. Like the first time I realized “Holy cow! I’m an adult!” when my rent was past due and I had to go make arrangements to pay it later on and not face eviction. The first time I went “Holy cow, guys can like me!” when I found out McGee had stopped by my house on a whim to ask me on a date (unfortunately I was out of town and couldn’t go). When I realized “Holy cow! I’m pregnant!” when  I saw BooBoo move in my stomach for the first time.

What realizations have you had? Do you ever wonder “How on Earth did I ever get here?!”? Feel free to share in the comments!

Thursday, January 23, 2014

Sweet and Sour Chicken and Vegetable Lo Mein

I love cooking different cuisines especially Asian food. There is just something about Asian food the entices me to keep coming back for more. I love the spices that are used in their food. Although this recipe is a simplified form of Chinese food, I love to make it because it is easy to make and super delicious. Stay tuned because I will post recipes on how to make Thai and Indian curries!


Sweet and Sour Chicken
Ingredients:
  • 2 chicken breasts
  • 2 tablespoons oil
  • 1/2 cup ketchup
  • 1/2 cup vinegar (just the regular one)
  • 1/2 cup pineapple juice (fresh or from a can)
  • 2 cups pineapple chunks (fresh or from a 20 oz. can; )
  • 5 tablespoons brown sugar
  • 1 1/2 tablespoons cornstarch
 Steps:
  1. Preheat skillet pan with 2 tablespoons oil. While oil is warming up, slice the chicken breast into bite sized wedges (it doesn't have to be perfect).
  2. Once the oil is hot, toss the chicken in. Let the chicken cook on one side before flipping over. Cook the chicken until it is about 80% cooked through.
  3. Mix the ketchup, vinegar, pineapple juice, and corn starch together. Add this mixture once the chicken is mostly cooked. Then add the pineapple.
  4. Cook the chicken and sauce for about 10 minutes on medium to high heat (sauce should be bubbling). Then cover with a lid and turn the heat down to low to allow the sauce to thicken up.
  5. Once the sauce thickens, serve it with rice or vegetable Lo Mein.
Vegetable Lo Mein
(I love this Lo Mein because you can use whatever vegetables you have on hand! I didn't have napa cabbage so I used celery in it to provide a crunch and it tasted good.)
Ingredients:
  • 8 ounces of cooked noodles (spaghetti or Chinese)
  • 1 cup chicken broth
  • 4 teaspoons cornstarch
  • 2 tablespoons soy sauce (can add another if you like your Lo Mein salty)
  • 1 teaspoon sesame oil
  • 2 teaspoons rice vinegar
  • 2 tablespoons oil
  • 1 1/2 teaspoons sugar
  • 1/2 medium red onion, sliced in wedges
  • 2 medium carrots (julienned slices or grated using a grater)
  • 2 stalks of celery and/or 2 leaves of napa cabbage
  • and whatever veggies you like such as mushrooms, green onions, etc.
Steps:
  1. Cook noodles according to package (note: I don't cook mine until completely soft because the noodles will be cooked again in steps 6-7).
  2. While noodles are cooking, cut the vegetables (red onion, carrots, celery, and others that you want in the Lo Mein)
  3. Preheat your skillet or wok with the oil
  4. While the oil is heating, make your sauce. Combine the chicken broth, soy sauce, sesame oil, rice vinegar, sugar, and cornstarch together.
  5. Once the oil is hot, toss the onions in. Cook for about 1-2 minutes and then toss in the rest of the vegetables (you can change the order of when you add the vegetables based on how crunchy or soft you want them).
  6. Then add the noodles and the sauce. Mix everything together.
  7. Let the Lo Mein simmer for roughly 10 minutes. This allows the sauce to thicken and allows the noddles to soak up the sauce.
  8. Once the sauce is thickened, serve the dish.

I hope you enjoy these recipes as much as my family enjoys them! Here is a picture of what the food likes like when it is in the pan and ready to eat! Bon Appétit!


Wednesday, January 22, 2014

The Blushing Violet jewelry Review and Giveaway


I’m so excited to be able to present our very first giveaway hosted by one of my favorite Work At Home Mom’s (WAHM). The Blushing Violet jewelry is run by Suzie,  a mom based out of New Brunswick, Canada. She specializes in one-of-a-kind homemade jewelry. I first discovered The Blushing Violet jewelry through a giveaway and instantly fell in love with her streamlined and unique jewelry. I don’t tend to like the big, chunky jewelry that you normally find in shops, and was thrilled to find someone making such streamlined and simple pieces. The first time I saw her peapods, I knew I had to have one.  When I was finally able to order one, I was impressed by how easy she was to work with and how quickly it arrived. Since she is based in Canada, it can take up to 2 weeks to ship, but it is so worth the wait.
My very first pendant.


Blushing Violet not only makes pea pod necklaces and earrings, she also makes tree necklaces, children’s earrings, ornaments, beaded bracelets, bookmarks, and pretty much any custom creation you can think of. They truly are perfect for Christmas, Birthday, Valentine’s, and Mother’s Day presents. When I approached her with the idea of making a tree based off of the Tree of Gondor from the Lord of the Rings for my mother-in-law, she rose to the occasion and made something truly beautiful and unique:
The Tree of Gondor
Both of my sisters, my sister-in-law, my mother-in-law, and a close friend now all have pieces that I purchased for them, and I’ll admit I’ve purchased one more for myself. I love how open she is to listening to crazy thoughts (like the Tree of Gondor) and how meticulous she is in her creations (I know she made at least one trial of the Tree before she made the final one). I recommend her to everyone who asks about my pieces and will continue to do so as long as The Blushing Violet jewelry is in business.
Custom Family Tree made for my Sister-in-Law.
Starting today, the Blushing Violet jewelry and several other vendors are offering an auction with prices on the items well below retail! If you bid, Blushing Violet is offering a $15 gift certificate giveaway!  Make sure to check it out here.  It runs until January 27, so make sure to look at it soon!

Suzie was kind enough to also offer a custom pea pod necklace or $15 gift certificate to one of our readers! The giveaway starts now and will end in 2 weeks on February 5, 2014 at 11:59 pm.

*Disclaimer* While I am a long time customer and have bought several item from The Blushing Violet jewelry in the past, I did not receive any compensation for this review.


Tuesday, January 21, 2014

A week of Letter "A"


Background Story

                When Monkey reached the toddler age, I didn't know exactly how to teach him. I never went to preschool when I was a child, and I didn't have preschool at my house. Plus, I find it easier to teach adults than child. This might be due to the fact that I was a serious child, and was very mature for my age. I did a lot of exploration activities with Monkey and didn't allow any television until he was well over two years old. However, I wanted to do more for him. I wanted to teach him like the way I can teach adults but, of course, at a child's level of understanding. I then started reading lots of articles and blogs that taught about child education. I am not saying I'm an expert, but I definitely feel a lot better now about teaching children.
                As I thought about how I wanted to do my preschool lessons, I decided it would be best to pick a theme for a week.  And, then have themes for each day. Here are my themes for each day of the week: Monday is reading, Tuesday is science, Wednesday is math, Thursday is art, Friday is physical exercise, Saturday is music, and Sunday is religion. You will probably notice that sometimes these themes might show up in another day, and that is totally fine. I focus heavily on one theme and revisit other themes in order that my son will grasp the topics. I found that having a theme for each day helped me plan activities quicker and helped me teach in different ways.
                I have to admit that I actually enjoy planning preschool lessons and doing them with my son. I hope you have as much fun as I have. I have included my template that I use to plan my preschool activities, and I hope that it helps you out like it has helped me out! The template will contain a place where you can write notes about each day. This is where I have included links to places where I got my ideas or songs from. Also, I use this to write down information I want my son to know. I know there will be times that I will need to look up information about certain topics I teach and this is where I can write down what I learn or what I want to teach my kiddos.

Click HERE for preschool lesson template and click HERE for my preschool template for letter "A".

Monday - Reading
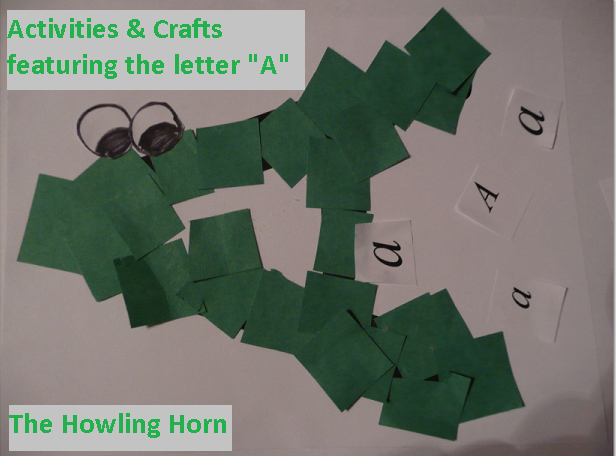
               This is the day that I introduce the letter of the week. I do a project with Monkey to make the letter A so we can hang it up on the wall. We made an alligator from the shape of the letter A. This website has ideas for every letter of the alphabet! We hung it above our alphabet board (Grandma gave that to Monkey). This way Monkey can see the letter all week. I then pointed out where the letter "a" was on the fabric board and talked to him about little a's and big A's.

                Next, I pulled out a blue backpack (that is his favorite color right now), and had him reach in and pull out objects that started with the letter A. Each object had its name taped to it with the letter A bolded and outlined. For example, Apple, Ant, Alligator, Angel, etc.
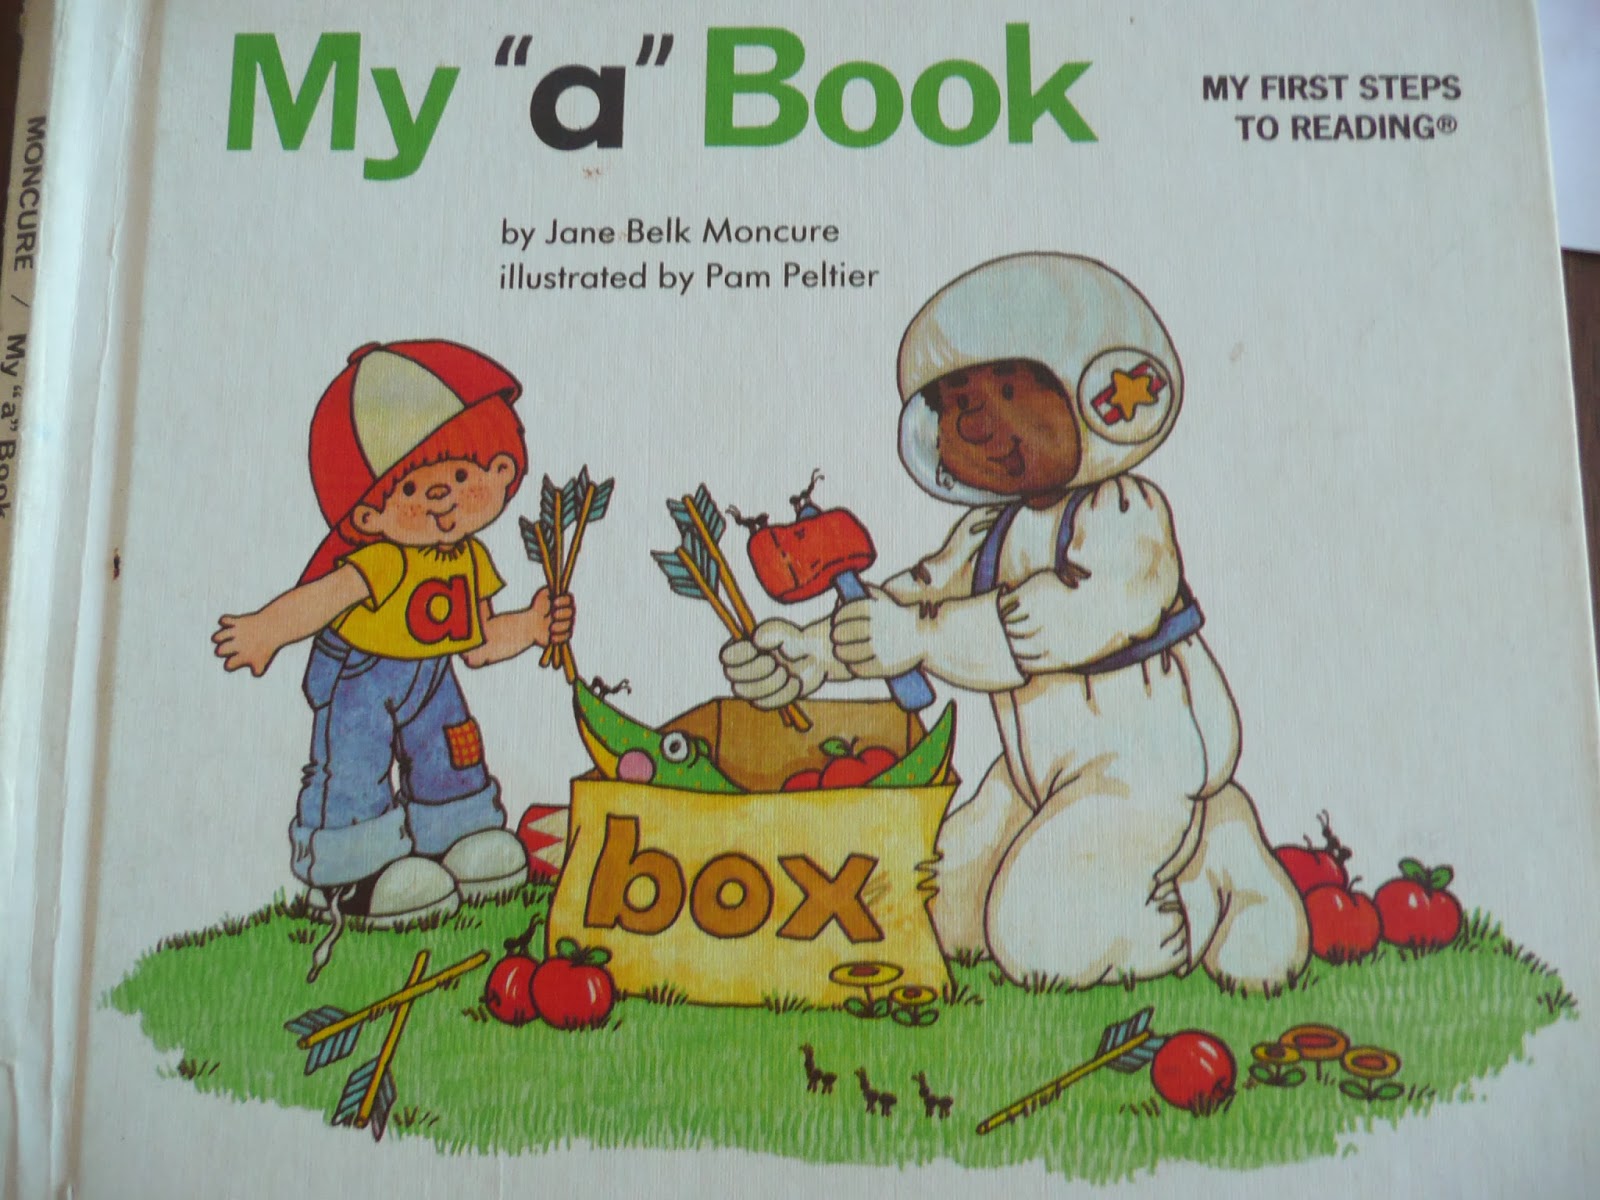
                We read books that taught about the letter "a". My mom had these books (pictured below) at her house so I borrowed them from her while I teach Monkey about the alphabet. I love these books because it has a story about each letter of the alphabet and at the end of the book has a page with more words that start with the letter "a". And, Monkey absolutely loves them!
                 Lastly, I taught how the letter "A" is formed by using play dough snake letter cards. I loved this idea when I came across it because my son loves play dough,and I thought it was a fun way to teach about letters. I printed off the letters and got them laminated (they work great for flash cards too). While we played with the homemade play dough, I also pulled out a cookie cutter letter "a". After we were done with the lesson, I let Monkey play with the play dough.


Tuesday - Science
                You will frequently see me doing a baking activity with my son for our science day. There is so much science in cooking and baking. We made apple muffins to go with our lunch. Monkey loves to dump the ingredients in the bowl and mix them together. While we made the apple muffins, I talked with him about apples. And, yes, it got a little messy. But, I didn't mind cleaning up the pan a bit before the muffins were placed in the oven. I love hands on learning!
                I also talked with him about the process of baking and why we add each ingredient to the bowl. I don't get super complicated, but enough so he can understand why each ingredient is needed. I told him about how baking powder helps the muffins get big because they produce bubbles that lift the batter or "dough".  I also taught about flour, eggs, salt, and cinnamon.
Wednesday - Math
                Monkey practiced sorting by size and color by using apples that we had in our home. I brought out two baskets so he could separate the colors into green and red piles. Then, we sorted by size and color. Each time we sorted, we would practice counting how many apples we had. This is a great way to practice counting numbers, finding similarities and differences, and sorting.

Thursday - Art
                I found this fun activity at this website. Monkey had so much painting apples on the tree. He even put apples on the bark because they were falling off the tree. This entertained him for a long time. I like how it helped me practice coordination and allowed him to use paint in a different way by using pencils.

Friday - Physical Exercise
                I was trying to think of something fun to do with my boy. The idea of pretending to be airplanes popped into my head, and I knew that my boy would love running around the house searching for letter "A" objects.
                I gathered up objects that started with the letter "A" and labeled them using a bright colored paper (I used yellow). I then taped the label onto each object and placed them around the house. This is how I labeled them: Apron, Alligator, Ant, Angel, etc. We then flew around the house searching for the words. When a word was discovered, we would talk about the word, remove the label, and then run off to find more words. This activity was lots of fun.
Saturday - Music
                Today we sang songs. We sang the alphabet song and listened to this song on you tube. I also showed Monkey an accordion to teach him about instruments that start with the letter "A".
Sunday - Religion
                Because my husband was home, we were able to both teach Monkey about certain religious figures. We read the story of Abinadi and Alma from the Book of Mormon. And, we also taught about Adam from the Bible. We did this by using flannel boards that I received as a gift from my sister. But, this can also be done using pictures and coloring pages found online.
Thoughts
                 The great thing about planning out a week of activities and crafts is that if one day something comes up then you can move around activities to better fit your schedule. Also, I read the books featuring the letter of the week every day. It is good to read to your kiddos for at least 20 minutes a day. 

What ideas do you have about teaching the letter "A"? Please share them!