Monday, January 20, 2014

Building Snowmen


Pinterest Monday Inspirations:

Building Snowmen

I’d like to start this post with a disclaimer: I still haven’t seen Frozen. So, no, the title isn’t a clever reference to it. I wish it was. Maybe, after I eventually see it, I’ll pretend that it started out that way. Haha.

BooBoo Bear loves anything to do with snowmen. If he could, he’d have snowmen everywhere. When I was searching for a Pinterest inspiration this week I knew I had to do this as soon as I saw it. McGee’s Mom made a Christmas tree out of felt for BooBoo this year, and, while he loved putting it up and taking it down again, I knew that the original size was going to be a little large for our small apartment. So, instead, I miniaturized it.

I found my felt at Walmart (we do technically have a craft store nearby, but it doesn’t exactly have a great reputation for good customer service, so we tend to stay away) for about $.27-.97.
Then, all I had to worry about was finding objects that were the right size to trace. I remembered these funnels and got right to work.


After tracing them on the white felt, I then freehand drew the remaining pieces for my snowman. To make sure they would be the right size, I took the smaller funnel and made little marks to indicate the width on my felt and then drew the shapes of my hats and scarves to be just a tiny bit bigger, so they would look natural on our snowy friend.

While I was doing this, BooBoo decided to grab the funnels and build a Christmas tree. He kept putting the bigger funnel down and then stacking the smaller ones on top. I love that his imagination inspired that! He probably did it for a half hour while I finished up the prep work. Love that kid.

Then, I cut the pieces out. I wanted the scarves to have fringe, so I made sure to cut a little extra out and then carefully used my scissors to make little cuts going at different angles. I think that that made a pretty nice looking texture.

I plan on using this as part of a quiet book for BooBoo to use during Church/long car rides, so I made sure I could fit all the pieces inside a small sandwich bag.


I did a test drive of this at church yesterday and came away with a couple of observations: I would definitely recommend doing this, BUT I would hot glue the ‘snowballs’ down. I would also somehow attach the bag of parts to the bigger sheet of felt- by sewing on a little envelope or stapling it on. I plan on making these tweaks and trying it out again next week. Watch for an update! I also have a lot of felt left, so I’m excited to try out some of my other quiet book ideas. I’ll be sure to post some of them as they happen!

Friday, January 17, 2014

Blanket Forts & Halloween Costumes

The majority of my week is spent taking care of my two kiddos without my husband. My husband has a crazy work schedule because his job does mandatory overtime. For about a year now, he has been working between 65 to 75 hours a week. He would get time off for Sundays and the major holidays, but that was only a few days every now and then. I struggled immensely during that time because I had a newborn baby and a toddler to take care of while he would be gone between 12 to 16 hours a day. I struggled taking care of my kids and doing household chores. I felt that I ended up watching the clock until it was nap time or bed time. I quickly discovered that this attitude wasn't helping the situation, and I was tired of being a grumpy mom who was so frazzled that I cried over the dumbest things.

I wanted to take charge of my situation and to treasure the moments with my kids. I didn't want to keep wishing for the next day because eventually my children will grow up, and I would regret not taking the time to enjoy those moments when they were little.

Even though there are some days where I can't wait until bed time comes, I am happy to say that those days don't occur nearly as often. I have tried thinking of ways to make our days more enjoyable. And, that is when I came up with doing things that we normally don't do like making blanket forts. I can't take credit for the dressing up in Halloween costumes because it was Monkey's idea. He found his costume in his closet earlier that day and wanted to wear it. I decided to relax and let him have some fun (I can be a little uptight about several things).

The beauty of blanket forts is that they don't cost anything and they provide hours of entertainment. All you need are tables, chairs, and lots of blankets. Monkey had so much playing with different toys in his fort and, of course, wanted Roo and myself to join him. He was my cute little monster in the cave. It was fun to realize how much time passed away, and I didn't even notice!


Monkey loved dressing up in his dinosaur costume that he insisted on wearing it all day long and through nap time. This is Monkey using links to make a train from his box. He LOVES trains and likes making trains from whatever materials he finds around the house.


 What activities do you do with your kiddos to make the day more enjoyable?

Thursday, January 16, 2014

Sweet Chicken Tacos


My husband and I love this one Mexican restaurant in our town because it serves a really delicious sweet pork quesadilla. I loved the way the restaurant did the sweet pork because it had cinnamon in it. My recipe might not be exactly like their recipe, but  I think it is delicious.  My husband thinks my recipe is better, but he might be trying to get some brownie points!

I love making this meal after I roast a chicken or have a pork roast for dinner because I get to use the leftovers and make a completely different meal. I am the type of person that can't stand eating the same food over and over again. Plus, this will help use your leftovers without your family complaining that it is the same meal. I have included two recipes: 1) the sweet chicken, and 2) the tortillas. The directions along with pictures on how I make this entire dish can be found after the recipes for those you like to see how I prepare this dish.

RECIPES:

1) Sweet Chicken by Christina Howell
*Note: this recipe can be used for pork too
Ingredients:
  • 2 cans tomato sauce
  • 4 tablespoons brown sugar
  • 1/4 teaspoon paprika
  • 1 tablespoon apple cider vinegar
  • 1 1/2 teaspoons cinnamon
  • 2 cups cooked shredded chicken (or pork)
Steps:
  1. In a large saucepan or even a frying pan, mix the tomato sauce, brown sugar, paprika, apple cider vinegar, and cinnamon together. 
  2. Then add the shredded chicken. Heat until the chicken is hot. 
  3. You can also mix all these ingredients together several hours earlier to let the chicken marinate in the sauce! If you forget, then don't worry. It will still turn out great. 
  4. While the chicken is warming up, prepare the garnish for the tacos.
Garnish:
  • Lettuce
  • Tomatoes
  • Onions
  • Cilantro
  • Whatever you like to put on your tacos, etc.
2) Tortillas by Ryan Lee (makes 15 large tortillas)
(Worldwide Ward Cookbook - Mom's Best Recipes by Deanna Buxton, pg. 42-43)
*note: I cut this recipe in half and make about 10-12 small medium tortillas
Ingredients:
  • 8 cups flour
  • 4 teaspoons salt
  • 1 teaspoon baking powder
  • 1 cup oil
  • 3 cups boiling water
Steps:
  1. Stir together flour, salt, and baking powder. 
  2. Mix in oil; there will be small lumps of oil in the dough. 
  3. Stir in the boiling water (hot water makes it easier to mix). The dough should be soft and pliable, but not sticky of stiff.
  4.  When the dough cools down, finish mixing it with your hands. It is okay to still have lumps from the oil (don't over mix). 
  5. Take a piece of dough about the size of a small apple and the roll the dough out on a floured surface with a floured rolling pin. Roll in one direction first, flip the dough over and around, and roll in the other direction. Do that a couple of times. It is okay to not have a perfectly round tortilla. 
  6. Bake the tortilla over medium-low heat on a DRY pan (no oil)! 
  7. When the tortilla bubbles up, flip it over and bake the other side for a few seconds.
DIRECTIONS (How I prepare this meal):

Because I forgot to marinate my chicken, I just threw all the ingredients together and let the chicken gently simmer on low while I made the tortillas.

I like to start the tortillas about 45 minutes before dinner so it gives me ample time to make the dough and roll out the tortillas. I find this is a great opportunity to have my toddler help me out because he can't get into too much mischief and he loves to roll out the tortillas. As I am making the dough, I start preheating my pans so they are hot when I want to start cooking the tortillas. You will finish cooking the tortillas quicker if you have two pans going.

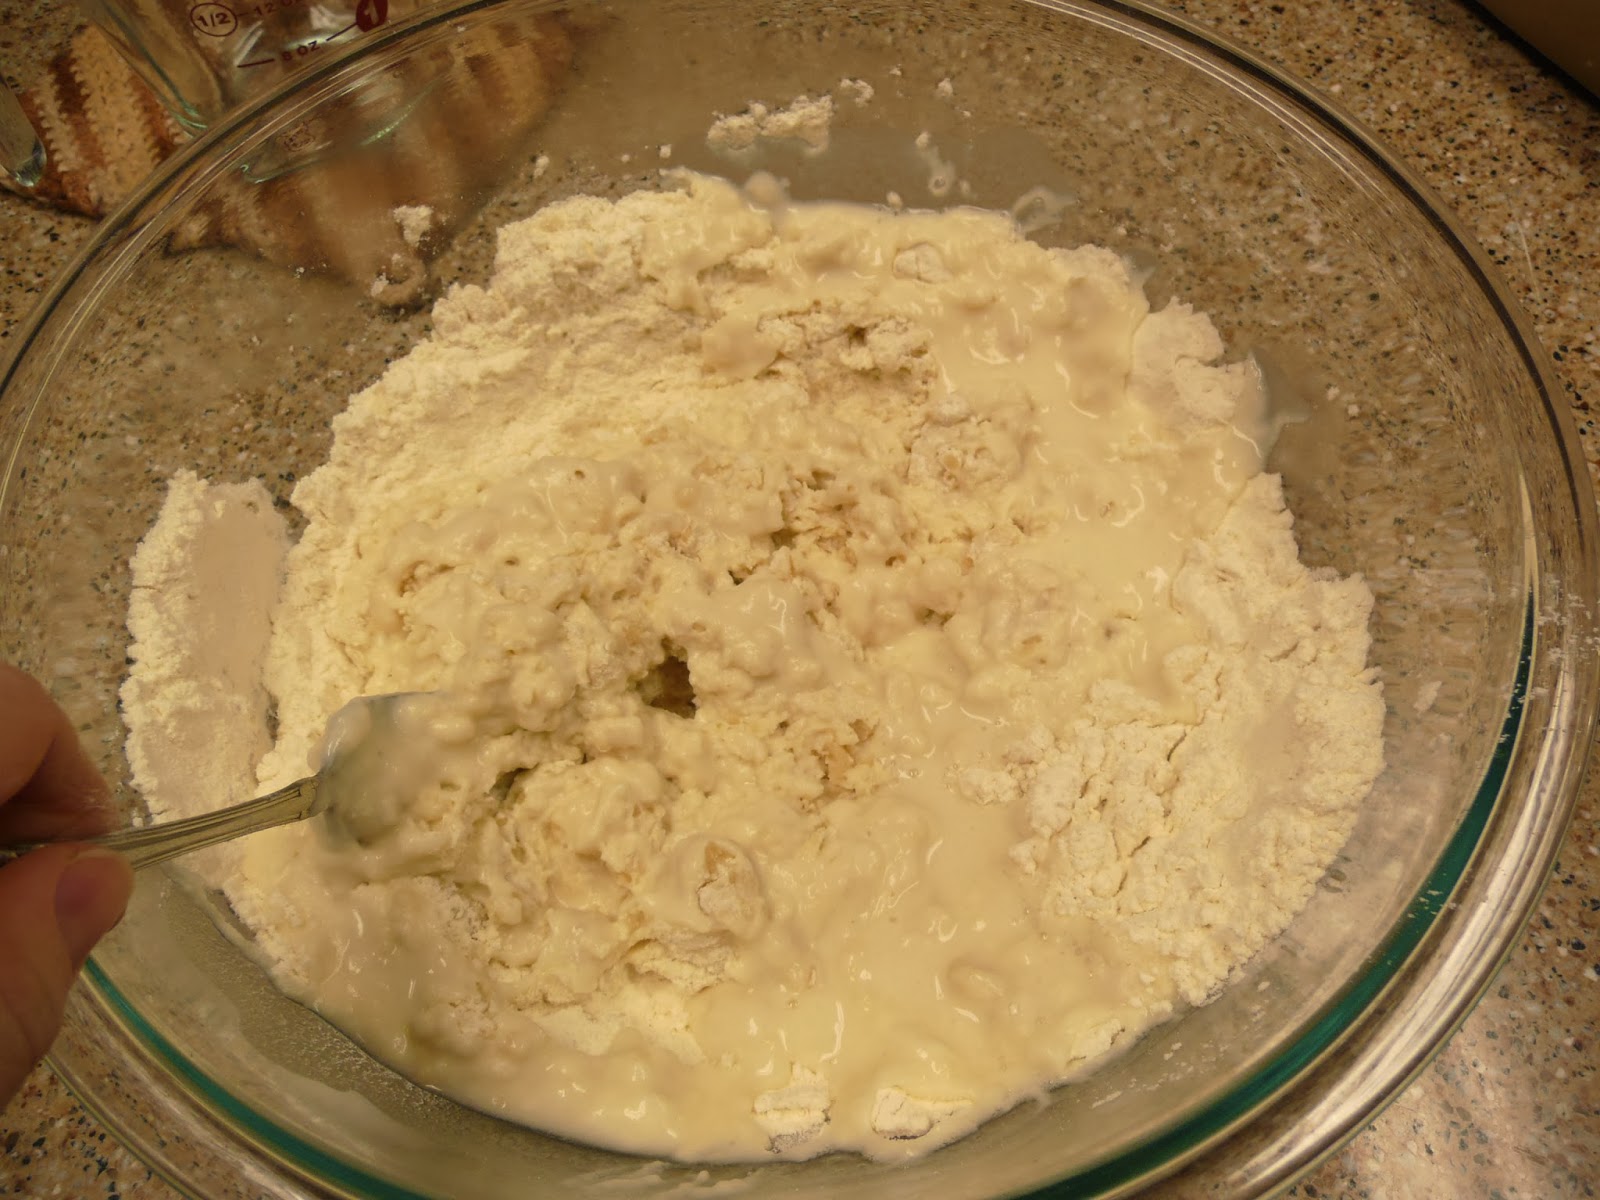
Here is the step by step process of making the tortillas with pictures (remember, I cut this recipe in half). After you mix the dry ingredients together, you add the oil. You will get lots of clumps in the flour mixture, and that is okay.


Next, add the hot water to the oil/flour mixture and stir. You will need to finishing mixing the dough with your hands. This is how the consistency of my dough looks.


Once my dough is made, I separate it into small golf ball sizes.I like doing this so I can make sure I get the amount of tortillas I want.


Then I roll them out using a rolling pin and flour. I make sure to flip the tortilla over and around (basically flip and switch directions) as I roll so I can get my tortillas to have "round" shape.


And, then I place the tortilla into a dry pan. I flip it over once it bubbles. After it sits on the pan and bubbles again, I remove it from the pan and sit it on a plate to cool.


This is how my oven looks as I am cooking the tortillas, the sweet chicken, and the rice.


Spoon the sweet chicken into a tortilla, top with your favorite garnish (such as pico de gallo), and serve with rice and beans.

I hope you enjoy this meal as much as my family does. We love the fresh tortillas before and during dinner!

Wednesday, January 15, 2014

My True Nature Review

A couple of months ago I participated in the Ultimate Baby Shower hosted by Sampler. Sampler is an app that allows you to send samples and freebies to friends. One of the items I was lucky enough to get (thanks to my quick fingered friend I partnered with J) was a sample pack from My True Nature. My True Nature sells products used for bath time. The labels come with cute little cartoon characters like Dewey the Dragon and Daisy the Skunk drawn on them. They’re so cute and eye catching!

Image from: http://www.mytruenature.net/

In my home, we have several severe allergies so I was stoked to be trying something that was natural and that I could actually pronounce all the ingredients of. The two samples I received were Dewey’s Baby BubbleBath and Daisy’s 2-in-1 Baby Shampoo and Body Wash. We used the Body Wash first and loved it! The scent is subtle and I didn’t feel like it was drying out my hands like some baby shampoos I’ve used. Then we tried the Bubble Bath. My son, like most 2 year olds, LOVES bubbles so he was super excited when I told him we were going to have bubbles in the bathtub! I was happy that it didn’t include random dyes like the last bubble bath soap he got for Christmas. But, when we poured it in (per the instructions) nothing really happened. We got about 5 tiny little bubbles and that was it. We were so disappointed! I will mention that the samples we received were leaking when they got here (I talked to someone about it and they said the samples were sent from a different facility than the big bottles they sell) and there may not have been enough solution to make the amount of bubbles we were hoping for.


Would I buy from them: Most likely, yes. They seem very friendly and personable. In fact, they sent me an email awhile after I got the product to ask if I’d received it and if I liked it or not. That gave me the opportunity to voice my concern about the way they were packaged and they were very kind and direct in their response

Would I recommend them to a friend: Yes. In fact, they sent me a code that any new customer can use for 30% off their order and I’ll post it here so you can use it too! NEWCUSTOMER


Disclaimer: I was sent samples as part of an event. I was not expected to write a review. I was not compensated otherwise. All opinions are my own.

Tuesday, January 14, 2014

Alphabet Days!


In 2008 I was at a crossroads. I was in a dead-end job, single, and a college drop-out. I had no clue what I wanted to do with my life. One weekend, I decided I’d had ENOUGH. I was going to change my life, find something I loved, and become happy with where I was. That was on Sunday. On Monday an acquaintance of mine mentioned her job was hiring. On Wednesday I had an interview. Two weeks later I started the most challenging and most rewarding job I’ve ever had (besides motherhood of course).
It was at an elementary school as an aide in a Severe Level Special Needs Classroom (also referred to as Life Skills). I LOVED it. I’ll probably talk about the things I learned there on here a lot (I use the skills I picked up on there on an almost daily basis), but this time I’m going to focus on one specific thing. Every day we had calendar time. We’d go to the front of the classroom and talk about the days of the week, the weather, the letter of the week, what number of the month we were on, colors, patterns, and sometimes social skills.
Tuesdays are going to be The Howling Horn’s Calendar Time- for the next 26 weeks we’re going to introduce fun ways to integrate learning the alphabet into your home. Every week will be a new letter. Then, we’ll move on to numbers and colors and other basics that can be taught to your kid no matter the age!
Watch for Christina’s introduction to the letter ‘A’ next week and be ready to throw in your own suggestions and ideas. We may even include them in a future post (with credit to you of courseJ)

Monday, January 13, 2014

About Hannah and Christina

Two Mama friends in different states, living slightly crunchy lifestyles and inviting you along our journeys of Motherhood. Follow us as we post preschool ideas, recipes, real life attempts at Pinterest pins, laughter, ponderings, and lots of giveaways.

Why The Howling Horn? Because we're punny and decided to combine our awesome last names (Howell and Horne) to make something truly unique and memorable.


Sunday, January 12, 2014

Contact Us

Questions/Comments:

We would love to hear from you! So if you have any questions or comments, then send us an email.
Email us at: howlinghorn@gmail.com

Product Reviews & Giveaways:

If you are interested in having us share the word about your exciting product, then send us an email. We love to do reviews of products and our readers love giveaways!
Email us at: howlinghorn@gmail.com