Saturday, May 31, 2014

InstaNatural Argan Oil, Rosehip Seed Oil, & Vitamin C Serum Reviews

Disclosure: I got this product as part of an advertorial.

About Pure Argan Oil
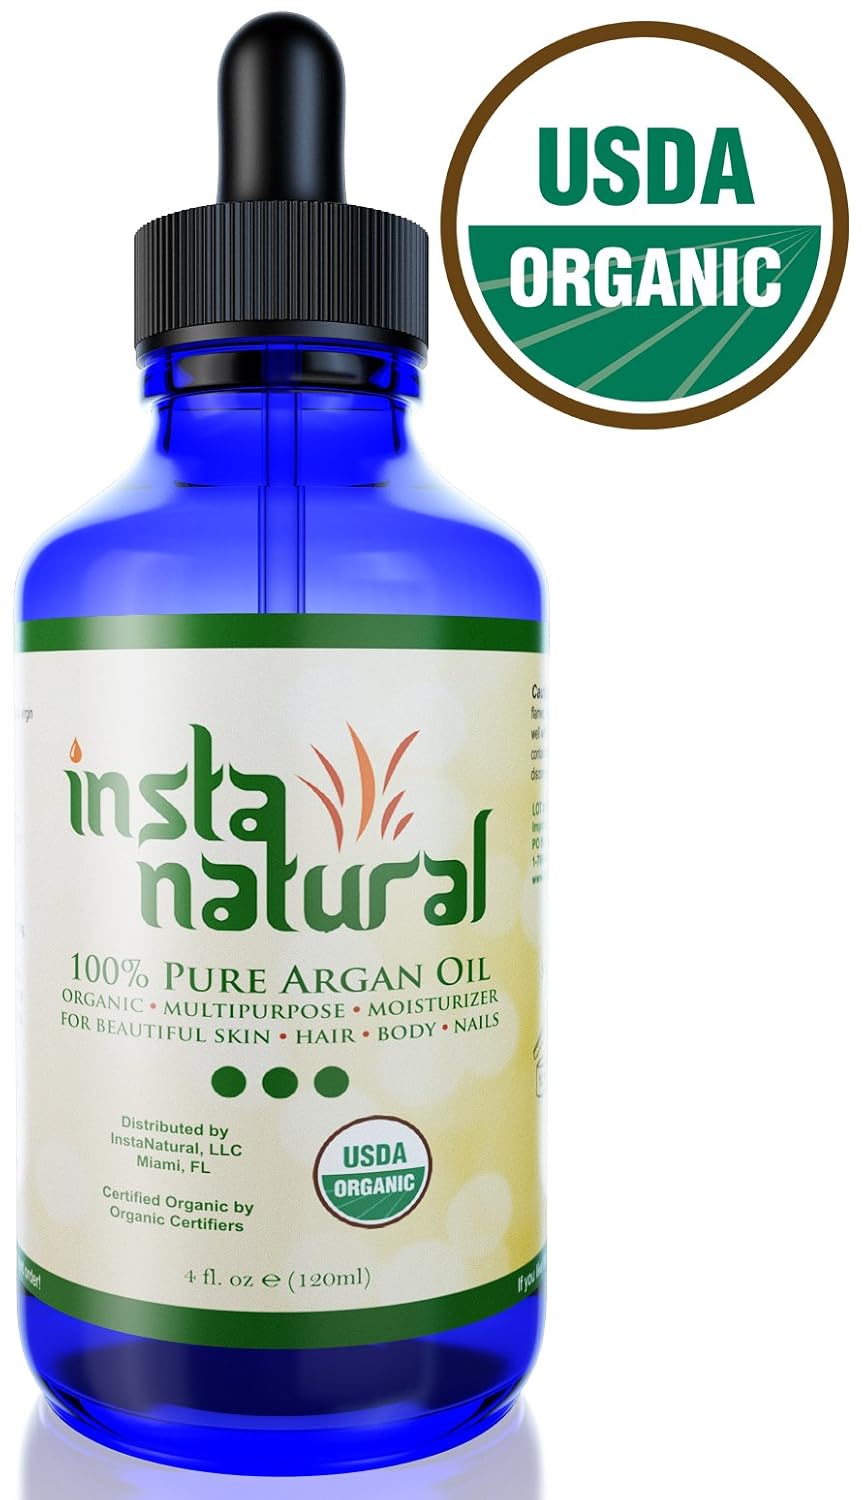
Here are some facts about Argan oil:

Lightweight & pure for the ultimate healthy glow.
• Look like a Hollywood Celebrity with 100% Pure Argan Oil ONLY.
No preservatives, chemicals, or artificial fragrances used.
• Made organically in small batches to ensure premium quality!
• Naturally freshens, hydrates and softens dry skin better than any other moisturizer on the market.
Repairs and beautifies hair, from roots to split-ends.
Strengthens brittle nails and cuticles. 


My Thoughts

All I have to say is that I am in love with Argan oil!!! I love how one oil can help with my hair, nails, and skin. Argan oil has a very faint smell so you don't have to worry about your nose being overwhelmed. It comes in a large bottle and it goes a long way! I only use a few drops to help my nails and skin every day so my bottle still looks full. 

I first tried Argan oil on my nails and cuticles because I have always had brittle nails. I have tried eating certain foods to help my nails, but nothing would work. I know part of my problem is that I do a lot of yard work and house work so my nails take a beating daily. From the first day of using this oil, I noticed that my cuticles were healthier and my nails were stronger! After a week of using the oil, my nails look amazing! I love having strong nails and healthy cuticles.

Because I do a lot of yard work, my fingers get really dry can cracked. After the first day of applying the oil to the rough patches, my skin was a lot softer. After I kept using the oil, my cracked skin was no longer cracked! All I have to say is that this oil is amazing.

I am now going to try using it on my hair to see how it will help my dry ends. I am already expecting great results because it has worked great so far. I definitely recommend getting this oil because it can help make your nails, cuticles, and skin look beautiful.

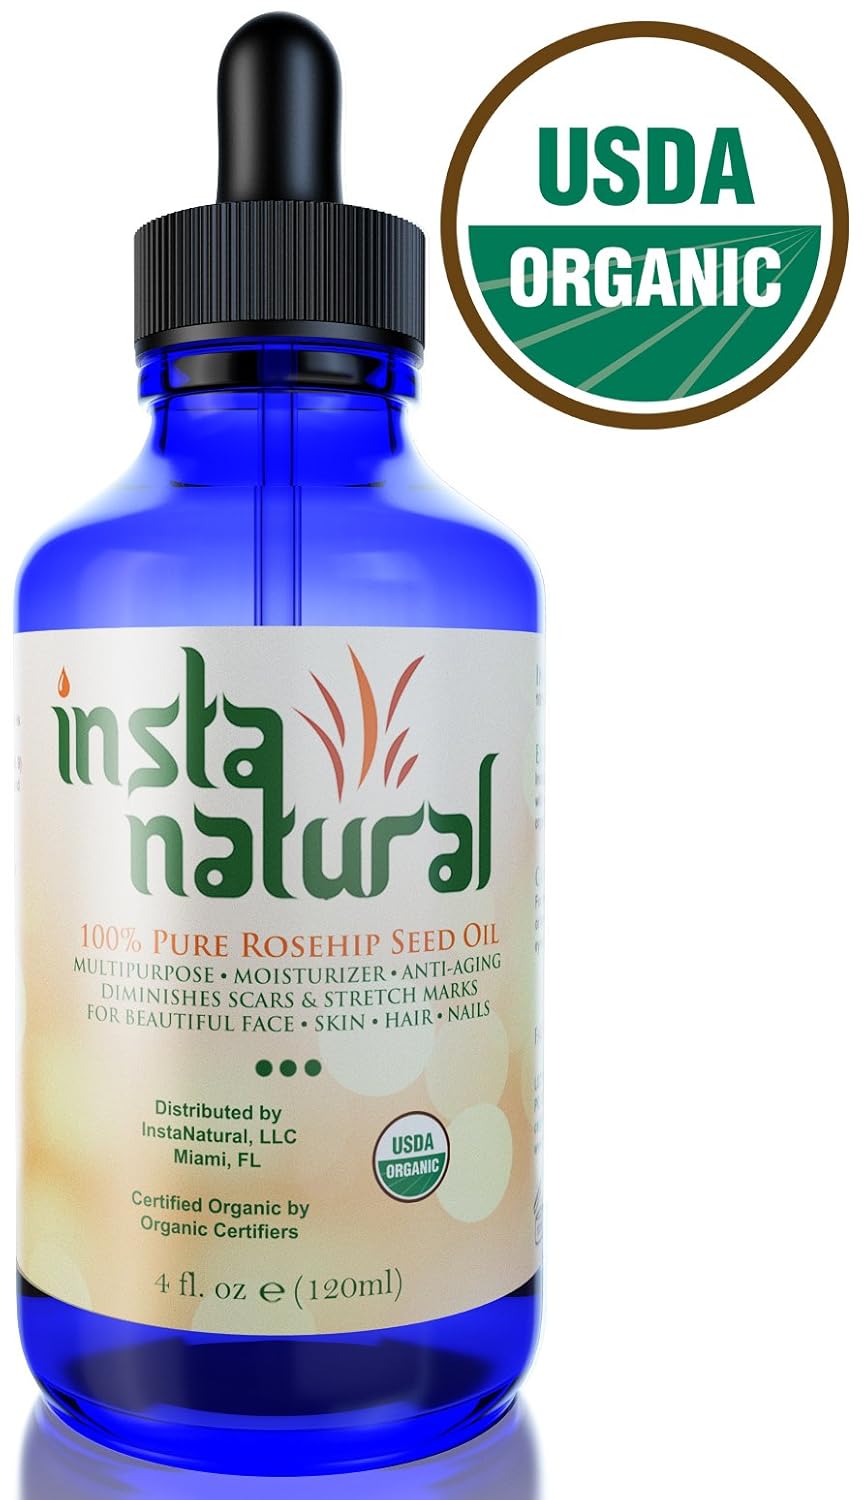
About Pure Rosehip Seed Oil

Here are some facts about rosehip seed oil:
  • Damage caused to skin due to sun-exposure
  • Getting help with dryness, roughness, and more
  • Decreasing old and hardened scars and diminishing the appearance of marks including acne scars, burn scars, dark spots, and stretch marks
  • Nourishing the skin deeply to make the skin smoother and more evern
  • Shinier hair and nail care
  • InstaNatural Rosehip seed oil is 100% pure and USDA certified organic, and unrefined to give you safe and effective multi benefits. 
  • Contains Essential fatty acids (Omega 6, 3 and 9), which is beneficial for healing the skin.
My Thoughts

I really wanted to try rosehip seed oil because I wanted to diminish my scars espeically my stretch mark scars. I know I shouldn't be bothered by the fact that I was able to have a baby, but the stretch marks still bother me. I really want to diminish them!

When I first used the oil, I was a little overwhelmed by the smell. Rosehip seed oil is hard to explain, but it is definitely not a rose smell! It is a mixture between a musky, woody, and nutty smell. It is not my favorite smell in the world, but I got used to it after several times of using it. Just don't worry that the oil is bad because it is not!

The oil definitely helped my scars. After a week of using the oil, I could tell that my stretch mark scars looked fainter. That is exactly what I wanted because I hate the red look of them. Also, the rosehip oil helped moisturize my dry patches of skin on my body. It was nice to see my heels and my elbows become soft again. With all my yard work, my skin dries out fast.

The oil comes in a fairly large bottle and I only use 1-3 drops. This bottle will last about 6 months unrefrigerated and 1 year refrigerated.

I also read about how rosehip seed oil can help promote hair growth. Since I want to grow out my hair, I am going to start using it on my hair and see how it goes. I have always wanted to grow my hair out long, but I just feel that it doesn't look pretty or is limp. Maybe this oil is just what I need. I will update you after a few months to let you know!

I definitely would try this oil if you want to diminish some of your scars and heal your skin!

About Vitamin C + Vitamin E Hyaluranic Serum
Our Vitamin C (20%) + E + Ferulic + Hyaluronic Acid Serum is More Advanced & Better than any other Vitamin C Serum on the market
• Provides unrivaled antioxidant benefits.
• Each ingredient works synergistically to boost one another.
• Hydrates & Moisturizes.
• Helps lighten the skin.
• USA Made in FDA Certified Facility.

Experience The Power of Vitamin C + Vitamin E + Hyaluronic Serum From The Very First Use!
• Many users have reported improved skin after the very first use.
• Our product reduces the visible signs of aging such as wrinkles and fine lines.
• It protects from external aggressors that cause dullness and dryness of skin and increase signs of aging.
• Powerful antioxidant properties give vibrant and younger looking skin.
• Reduces different types of scars, marks, and spots for a clear skin.

My Thoughts

I like to be proactive about my skin because when my skin feels great, I feel great. Because I am a busy mom with little kiddos, I feel like my skin has taken a beating. I end up getting more sun exposure than I should and "beauty sleep" gets interrupted by my precious little baby. So I worry about wrinkles a lot.

The wonderful thing about this serum is that it is so easy to use and doesn't have a strong odor. I like things that don't stink. After a few weeks of using this serum, I noticed that my wrinkles were fainter and my skin looked healthier and younger.

This is a great product to help revitalize your skin!


I received one or more of the products mentioned above for free using Tomoson.com. Regardless, I only recommend products or services I use personally and believe will be good for my readers.

Friday, May 30, 2014

Fun Summer Ideas

Now that school is out and summer is here, my kids want to be outside all the time. I love that they want to be outdoors, but sometimes I get bored being cooped up in our yard doing the same things over and over. So I have spent this week thinking of some ideas to make this summer fun. And, please share what you do to make the summer months fun and unique!

Fun Summer Ideas
  • Go on a nature walk (can play I spy or do some type of bingo card with animals/birds on it)
  • Go on a hike
  • Go to the park
  • Play at the pool or splash pad
  • Go on a picnic
  • Make mud pies (messy but loads of fun)
  • Run through the sprinklers
  • Blow bubbles
  • Play with sidewalk chalk
  • Explore local historic sites (you will be surprised what your community has to offer!!)
  • Go to the library and do reading time or other activities they offer
  • Visit a fair
  • Go to the zoo 
  • Build sand castles (you can do this in a volleyball court at a park)
  • Tie dye shirts
  • Water balloon fights
  • Build paper airplanes
  • Go camping or pitch a tent in the backyard
  • Plant a garden
  • Easter egg hunts (you can just use empty eggs but my kiddo loves hunting for them)
  • Service projects

And here are some great sites that include lots of activities for kids:
Kids Activities Blog
Sow Sprout Play


Have a fun summer!


Thursday, May 29, 2014

Black Pepper Chicken and Potato Soup

Poor McGee has been sick since Memorial Day. Food has not sounded good and he's barely been able to keep anything in. Therefore I was rally excited when he asked for soup today. There were just a few problems- I didn't have a lot of ingredients, he couldn't have dairy, and I didn't have a lot of time. I instantly looked online for something simple involving chicken, potatoes, and non-cream based. One of the first recipes I found was this. Pretty straight forward, but I didn't have turnips or carrots, and I'll admit I was skeptical that something so simple would taste good.

I shouldn't have worried. It's amazing. I did tweak it just a little bit and the flavor of the broth was perfection. So easy to prepare and it takes 7 ingredients-including the salt and pepper! Plus, look how good it looks!


Mmmmmmm.... I also love the fact that it uses ingredients almost everyone will have on hand. Great for a delicious, nutritious, and easy meal on a budget.

Black Pepper Chicken and Potato Soup

3 medium potatoes (red or russet is fine), cubed
1 onion, chopped
5 chicken breast tenderloins
5 cloves garlic
salt and pepper to taste
3 bottom halves of green onions (optional)

Out cubed potatoes, chopped onion, whole chicken breast tenderloins, garlic cloves (can use chopped if preferred, but I like the flavor it gives the broth when they're whole), and green onions (if using, I added them because I had them and loved the garnish they made after cooking) to a large soup pot. Add water until ingredients are just covered. Add salt and pepper. Put pot on high heat and bring to boil. Cover with lid and lower temperature to low and allow to simmer for 30-45 minutes. Pull out chicken and chop into pieces. Add back into pot and taste broth, seasoning with salt and pepper until desired flavor. Allow to simmer for 10-15 minutes. Enjoy!

I plan on making this the next time I bring a meal to someone because it's so easy and really makes you feel like you're getting a big, warm hug from someone who loves you. Enjoy!

Wednesday, May 28, 2014

Last Letter Review

Disclosure: I got this product as part of an advertorial.

image obtained from website
About the product

The Classic Last Letter Game with a Creative Twist
Our fresh take on this simple last letter game will inspire creativity, laughter and fast thinking. Race to come up with a word that is pictured on one of the cards in your hand. Your word must begin with the last letter of the word previously called. Call your word first to discard a card. Be the first player to get rid of your cards and you win! Unique illustrations encourage creativity and allow for countless interpretations and a new experience each time you play.
  • Ages 8 to Adult, Multiplayer
  • Includes 61 Illustrated cards with original artwork
  • Travel-friendly storage box
  • Nostalgic last letter concept and "seek and find" play pattern appeals to the whole family
  • Game invented by Joe and Dave Herbert

My thoughts 
*note: pictures were obtained from Amazon.com since there pictures do a much better job at showing how the game works

My family loves games, and I love playing games when we have company over. However, sometimes playing games can be a huge pain when they take a long time to play or have really complicated instructions. I like the ability to pull out a game that doesn't require tons of explanation, and  Last Letter fits that requirement.

Here is how the game works:
*taken form the instruction manual
Goal:
To be the first player to get rid of your cards.

Setup:
Each player is dealt five cards face-down. One card is placed face-up in the center of the table in order to create the Discard Pile. The remaining cards can be put aside for future games.

Steps to play:
image obtained from website
  1. The dealer looks at the card in the Discard Pile and calls out a word that represents something picture on the card. 
  2. All the players (including the dealer) look at their cards and try to find something pictured on their cards that begins with the last letter of the word just called.
  3. Once a player finds an acceptable word pictured on one of their five cards, he or she calls out the word and places the corresponding card on top of the Discard Pile. All players now look to fin a word that starts with this new letter.
  4. If two or more players call out an acceptable word at the same time, the first of those players to place their card on the Discard Pile wins the tie. All other players involved in the tie must keep their cards.
  5. The game continues until one player discards his or her last card. This player is the winner!
I wanted to try it out as soon as I got the game so I played it with my husband. We had a fun time trying to out think each other and being creative. We loved the game so much that we played it with some friends. Our friends thought it was an easy game to learn and fun to play! I really liked how this game can have up to 12 people playing! Plus, the game is still quick to play even with more players.

image obtained from website

There are plenty of cards to play with so don't worry about having game sessions that are similar. It will change each time because the illustrated cards have very interesting and silly pictures on them! My oldest child is only 3 years old so he couldn't really play the game. However, he enjoys looking at the cards and pointing out various objects and people he sees. I love how this game is encouraging him to practice speaking. I can't wait until he is older so we can play this game to help him with his spelling and vocabulary skills!

I love games that are fun while it makes your brain think. I definitely recommend getting this game! You can go here to buy it.


I received one or more of the products mentioned above for free using Tomoson.com. Regardless, I only recommend products or services I use personally and believe will be good for my readers.

Tuesday, May 27, 2014

Dr. Carey’s Baby Care: First Year Baby Care Guide Review & Giveaway

Disclosure: I got this product as part of an advertorial.


About the product

This is how Dr. Carey describes his book:
A Doctor’s Original Baby Care Guide for that Important First Year with over 120 full color pictures, I am able to share baby care as if you were in my office. Neatly written in under 100 pages (print version), this easy to understand guide is written by a doctor to assure reliable information for you and your child. My goal in writing this guide is to ease your concerns and eliminate those sleepless nights. Dr. Carey’s® First Year Baby Care Guide will provide essential baby care knowledge and a better understanding of when your baby needs to be seen by a professional. In short, the confidence to be an outstanding parent to your baby.

Some of the topics Dr. Carey shares in this book:
Your baby’s developmental milestones
Newborn rashes explained
How to handle minor medical problems as they arise
Surviving your baby being sick
Answers to the most common questions parents ask
PLUS – A place to record your baby’s milestones


About the author

picture  from website
Dr. Carey is a respected practicing pediatrician in Ventura, California. He hosts Dr. Carey’s Baby Care on CAPS-TV in Ventura and other public broadcasting stations nationwide. Keeping up with technology and user friendly access, he has a website, a YouTube Channel, and a weekly newsletter. Socially you can find him on Facebook, Twitter, Google+, Pinterest, and LinkedIn. In addition to his medical expertise, Dr. Carey possesses an extensive publishing background.

He self-published a comprehensive review series for medical students and has written articles for Ventura Parent Magazine. He serves as a guest speaker for numerous expectant parent classes. Dr. Carey is known for his relaxed and fun attitude, good bedside manner and for always taking his patient’s concerns seriously. He has a deep love for the children he cares for. The creation of his first book will help you get through all the hiccups of your baby’s first year.

Want more information
Click here to go to his website
Connect with Dr. Carey through Facebook
Connect with Dr. Carey through Twitter
Connect with Dr. Carey through Pinterest
Connect with Dr. Carey through G+
Connect with Dr. Carey through YouTube


My thoughts


With being a relatively new mom, I have lots of questions. I usually go online to research about my concerns
for my baby because I don't want to go to the doctor every time I am worried (plus, that would be very expensive). The reason I would go online to research is to find some pictures.

That is why Dr. Carey's Baby Care: First Year Baby Care Guide is so handy! This guide has over 120 pictures to show various baby ailments such as skin rashes, craddle crap, teething, diaper rashes, what baby poop should like and more! It is nice to have a book that I can quickly refer to for my questions.

As you can see from this picture, there are a lot of topics that are covered in this book (and that is only half of the table of contents). The book is very well organized, and is easy to read and understand. I pretty much like everything in here except the advice about food. I have certain baby food viewpoints that are not like everyone else. But, food lists vary between every physician and he reminds his readers about that.

I think this is a great book for new moms and for moms of several kids. I have used it several times to look up information for my baby and to help out a friend when she was asking me questions! You can buy it here and you have a chance to win one!


Giveaway
*open to anyone 18+ who lives in the United States or Canada
*Winner has 48 hours to respond before a new winner is chosen
*If you have already won this prize on another blog, then you are not eligible to enter


I received one or more of the products mentioned above for free using Tomoson.com. Regardless, I only recommend products or services I use personally and believe will be good for my readers.

Monday, May 26, 2014

Flower Wreaths

I love making floral arrangements. It is something that I stumbled upon when I was a teenager when my mom was trying to make a floral arrangement for a wedding arch for my brother's wedding. I told her I would do it, and that is when I discovered this ability.

One of my favorite type of floral arrangements involves dried flowers. I love having decorations around the house that remind me of special occasions. This floral wreath that I made this week is for my sister. She recently got married, and I told her that I would make something special with her wedding flowers.


Here are the general instructions to make a floral wreath along with how I made the wreath pictured above:

Step 1
You will need flowers (dried or fake), wire cutters, floral tape, steel wire, hot glue gun, greenery (ivy, leaves, etc), and a wreath (I buy mine at Hobby Lobby and used 40% off coupon found on their website)


Step 2
Attach whatever type of greenery you want for the "base" of the wreath. It can be ivy or some variety of leaves (it can be whatever color you want!). The greenery helps add depth and color to the wreath. I attach the greenery by wrapping it around the wreath and attaching it by using floral tape.


Step 3
Attach the flowers to the wreath either by using floral tape or a hot glue gun. I prefer using floral tape with fake flowers since it they don't break with a lot of movement. I prefer using a hot glue gun to attach dried flowers to the wreath because it allows me to attach them with very little manipulation.


I attach the flowers that I want to be the focus of the wreath first. Thus, I used the delphiniums first. Because the delphiniums had a long stem, I used the floral tap. I put them on one side of the wreath because they will be balanced by the ribbon.

I then attached the hydrangeas using a hot glue gun because I wanted them to look like snowballs.


Step 4
Next, I attached the ribbon. Ribbon can be attached in a variety of ways. For this wreath, I wanted to use two types of ribbon because royal blue and red were my sister's wedding colors. I started off by first attaching the blue ribbon.


Then after one twist, I attached the red ribbon to the blue ribbon using some hot glue and proceeded to wind the two ribbons around until I reached the hydrangeas, and then finished the ribbon part by ending it with only using the red ribbon (I just cut the rest of the blue ribbon off at the back of the wreath).


Step 5
Attach the red roses. I attached the red roses last because they still look pretty when seen sideways. I attached them by using my hot glue gun and gently pushing the stem with the glue into the wreath. The roses were attached to both sides of the wreath.


Step 6
If necessary, attach more greenery. I attached some dried green leaves because the wreath just didn't seem balanced. I also liked the depth of color that was added.


Step 7
Create a hanger by using steel wire and wire cutters. I will be honest and admit that I don't make pretty hangers. I simply cut some wire (about 8 inches long) and wrap it several times among the wreath branches


I ended up getting another piece of steel wire and wrapping it around the first hook so it would be stronger and so it would look nicer.

Step 8
Make sure everything is attached and then enjoy your beautiful masterpiece


Sunday, May 25, 2014

Signed, Sealed, Delivered Review

Hallmark has recently launched a new television series called Signed, Sealed, Delivered. This series is created and executive produced by  Martha Williamson, who also created Touched By An Angel.

About Signed, Sealed, Delivered

The new original series "Signed, Sealed, Delivered" is a wonderful combination of romance, comedy and drama that follows the lives of four postal detectives who transform themselves into a team of detectives to track down intended recipients of undeliverable mail. Their missions take them out of the office where redirected letters and packages can save lives, solve crimes, reunite old loves and change futures by arriving late but somehow always on time. The team includes charming Oliver O’Toole (Eric Mabius), the group's leader is a man of faith who prayerfully approaches his work with the goal of making a difference in people's lives; new team member, Shane McInerney (Kristin Booth), a technophile who brings 21st century sensibility to the group; free-spirited, “girl next door” Rita Haywith (Crystal Lowe) who has a photographic memory; and lovable Norman Dorman (Geoff Gustafson), a master in conventional research methods.
The show aires SUNDAYS, 8/7c on Hallmark

This incredible series even incorporates scripture in its themes and in the conversations between characters. In FACT, The American Bible Society has built a bible study to go with the series.

Here is a trailer for the series:


Want more information?


My thoughts

I didn't know about this series until I watched the episode that aired on March 25, 2014. I usually enjoy watching Hallmark TV series or movies because they are uplifting and clean. Even though I didn't get a chance to see the previous episodes, I was still able to follow the Signed, Sealed, & Delivered

I think the premise of the series is really fun and exciting because the characters work hard on delivering mail that has been deemed undeliverable. I liked the concept that sometimes mail isn't delivered for a reason, but it gets delivered when it is needed to be.

The episode started out trying to where the undeliverable letter needed to be delivered. Through the work of Oliver, Rita, Norman, and Shane, they were able to find that the letter belonged to a woman named Ellie. Ellie wrote the letter when she was in high school to her future self. It was a letter about what Ellie wanted her life to be about which was to marry Bobby, the man she loves. Ellie and Bobby both have Down Syndrome. This couple faces many challenges, but is able to overcome them through their faith and through their study about marriage by searching the scriptures. The couple's journey inspires and touches the people around them especially their parents. You will have to watch the episode to learn how it ends!

I now plan on watching the previous episodes and watching this series each Sunday! I recommend giving this series a try because it will definitely brighten your day.

Thursday, May 22, 2014

Lemon Cilantro Rice

My family loves rice. And, I love making rice with different flavors. This is a great recipe to serve with chicken and a variety of Mexican dishes.


Lemon Cilantro Rice Recipe
*note: this recipe is adapted from the recipe found in Rocky Road by Josi S. Kilpack. Her recipe is Lime Cilantro rice. I love her books!
*This recipe is good for lemon or lime

Ingredients
  • 1 1/2 cups uncooked rice
  • 1 teaspoon olive oil
  • 1  1/2 teaspoons lemon juice (fresh or from concentrate)
  • 1 (~15 ounce) can of chicken broth
  • 1 cup water

Sauce - to mix into the rice
  • 1 1/2 tablespoons lemon juice (fresh or from concentrate)
  • 3 teaspoons sugar
  • 4 1/2 tablespoons fresh chopped cilantro

Steps
  1. Combine water, chicken broth, olive oil, and lemon juice into a medium sized saucepan. Bring to a boil.
  2. Add the rice to the saucepan (note: I like to wash my rice because it cooks better, is fluffier, and gets rid of the harmful chemicals).
  3. Cover the saucepan and reduce the heat to low
  4. Cook on low heat for about 25 minutes or until tender.
  5. When rice is almost done, make the sauce by combining the lemon juice, sugar, and cilantro in a bowl.
  6. Once the rice is done, pour the sauce over the cooked rice and mix it.
  7. Enjoy!

I hope you have making this recipe. Sometimes, I just eat this rice all by itself because I love it that much! Feel free to let me know how it turns out or what other rice recipes your family enjoys!

Wednesday, May 21, 2014

Bobee Inc. Whale Decal Review and Giveaway

*Disclaimer: One or more products in this review were given to me in exchange for my honest opinion. All opinions are my own*

I was given the opportunity to review these adorable whale vinyl decals from Bobee Inc. Stacy Harfert is the brains behind this company and I love what she's done with it. I stumbled across their page a little while ago and loved their adorable vinyl. I also just discovered that she invented a diaper dispenser, which looks really clever. I cloth diaper so it probably wouldn't work for us right now, but I would have killed for something like that when we were using disposables with my son BTA (Before the Allergy). Definitely check it out here.


I was given the opportunity to test and review their new whale decals. First off, I'm a dork. I totally thought it was just one big decal and was pleasantly surprised to discover that it was a pack of 5 reasonably sized whales. I chose Azure Blue and love it! The set up was super simple: Make sure you have a clean and dry area on the wall, rub the decal to attach it to the transfer paper, place it where you want it on the wall, rub it firmly, peel the transfer paper off slowly stop and rub if parts are not sticking to the wall, step back and admire your cute decorations.  BooBoo loves his "Shark Whales!" as he calls them. They've now been up for a week and show no sign of going anywhere, despite their exposure to humidity. I would definitely recommend these!


Apply to clean and dry surface

Rub onto wall (I used a pan scraper)

Peel off transfer paper

Step back and admire.

Want your own set? They're available on Amazon here for a really reasonable price. Also, Stacy has generously offered to give away one set to a reader in their choice of color! Giveaway starts now and ends May 28! Good Luck!


The American Bible Challenge Review & Giveaway (#BibleChallenge)


About The American Bible Challenge

The American Bible Challenge is a fun-spirited game show that celebrates the Bible, its teachings, relevance, and place in American culture. Who will be the host this game show? Join host, Jeff Foxworthy, as he explores the humor in everyday family interactions and human nature

The American Bible Challenge will be partnering with Game Show Network again for Season 3.

When: Premiers on Thursday, May 22, 2014
Time: 7:00 CST (8:00 pm EST)


Here is a sneak peek:


You can get more information about this fun show at:

Website: http://gsntv.com/shows/the-american-bible-challenge/


My thoughts:

I have actually never heard of this game show until now. I don't watch a lot of television because I just don't like what is on, and I feel television can be a waste of time if it isn't used properly. However, I don't mind watching shows every now and then to relax and unwind after kids are in bed or after a lot of house and yard work has been done.

I started watching the other seasons because I wanted to know more about the show, and I have to say that I like it. I like how I can learn more about the Bible and get some laughs by the host's jokes and sometimes the silly contestants. 

I'm excited to see how Season 3 will turn out! So make sure you tune in on May 22 at 7:00 pm CST to catch this show on the Game Show Network.

Giveaway

I'm excited to let our readers know that we will have a giveaway to win a prize package that includes: The American Bible Challenge hat, shirt, and poster. How awesome! Good luck.


*Open to anyone 18+ who lives in the US or Canada
*Have 48 hours to respond before a new winner is chosen
*Dates: May 21 - 28, 2014


Disclosure (in accordance with the FTC’s 16 CFR, Part 255: “Guides Concerning the Use of Endorsements and Testimonials in Advertising): Many thanks to Propeller Consulting, LLC for providing this prize for the giveaway. Choice of winners and opinions are 100% my own and NOT influenced by monetary compensation. I did receive a sample of the product in exchange for this review and post.

Only one entrant per mailing address, per giveaway. If you have won the same prize on another blog, you are not eligible to win it again. Winner is subject to eligibility verification.

Tuesday, May 20, 2014

A Week of the Letter "R"

For those you have been following the Howling Horn, you know that I like to post a week's worth of activities for each letter of the week. I like being able to expose my kiddo to a variety of words that start with the letter of the week and do some fun projects. Here is another fun week!


Monday - Reading


I have to say how excited that I found this letter of the week project for letter "R" on Pinterest because it teaches about two words instead of one word! I loved how I could teach Monkey about rain and rainbows. This project is really simple because you just need construction paper, cotton balls, black paint or black markers, glue, and scissors. I just cut out the shapes I needed (free handed) because it doesn't have to be perfect (your little one won't care). And, Monkey loved this project so much. I had fun myself.


Then we sat down to read My "r" book where I could teach about uppercase and lowercase "r" and the sound "r" makes. Monkey loves these books because they are so silly. I love them because they work really well at teaching the alphabet.


Note: throughout the week, I point out objects that start with the letter "r". You can do this in books, shopping, or being outside. You will be surprised by what you can teach your little one through just everyday events.

Tuesday - Science

Two words: rainbow milk. I did this for chemistry demonstrations when I belonged to the chemistry and biochemistry club at the university I attended. You can find the instructions on how to do this simple but fun activity at chemistry.about.com.

Monkey was so excited to play with milk and food coloring. I set the experiment up by placing some milk in a plate and adding the food coloring in separate areas. I put the dish soap onto Monkey's finger and allowed him to put his finger into the milk dish.


Because Monkey started to play with the milk, the experiment didn't turn out exactly the way it should of. But, it worked pretty well considering a 3 year old was doing it! Just goes to show how much Monkey loved this activity. For the explanation on the science behind this experiment, go to the same website.


Wednesday - Math

I decided to do things a little differently today. I wanted to do a game where Monkey could practice counting. So we did a paper plate ring toss. I got this idea from A Little Learning For Two. It is a really simple concept and really easy to set up. While Monkey colored some paper plates, I assembled the ring toss holder by using a paper towel cardboard tube and a small cardboard box for the base.


While Monkey threw the rings, I had him practice counting. It was a lot of fun. One thing I would suggest is using heavier paper plates! The cheap paper plates work okay, but you will need to add many layers so they are heavy enough to throw.


Thursday - Art


Monkey likes rockets so we did a rocket art project today. It is something I thought of because I wanted to have Monkey practice colors and shapes. Out of construction paper, I cut rectangles and triangles in various colors.
I love how he sticks his tongue out when his concentrating!!


Then, I attempted to show Monkey how to assemble a rocket. Before I could even finish, he quickly took over. He LOVED this activity. He had so much fun gluing and making rockets. Even though not all the rockets look like rockets, I was happy that he was able to be creative and enjoy himself. 


Friday - Physical Exercise

I taught Monkey about running and racing today while we played outside. I liked the idea of doing something simple. Monkey had fun racing me to different areas of our yard. I just have to say that sometimes the simplest activities and ideas are the most effective at teaching your kiddos. So don't be afraid or disappointed in yourself if you are doing things simple! Your kids will still learn so much.

Saturday - Music

Monkey enjoys listening to music so I allowed him to play with a radio today. I just let him change stations and do whatever he wanted to. Probably about half the time we listened to static music, but I didn't mind since Monkey was just so happy and excited. Monkey learns the best by using his hands so I tried to do my best to allow him some more hands-on learning. 


Sunday - Religion

I decided to teach Monkey more about reverence. Monkey is at the age where he is just so full of energy that sitting still or using indoor voices can be a challenge. I don't expect him to perfectly behave like an adult, I just want him to start learning that there are places where he needs to be reverent and respectful. I showed him a picture of a church and explained that at church we need to be reverent. I told him reverent means folding your arms, using indoor voices, being nice, doing your best to listen, and doing quiet activities. It was a short lesson, but I feel he understood it since he paid attention for the majority of the time.


Want more alphabet lesson ideas? Then check out our other posts!

Letter A   Letter B   Letter C   Letter D   Letter E   Letter F    Letter G   Letter H   Letter I   Letter  J

Letter K   Letter L   Letter M    Letter N   Letter O  Letter P   Letter Q 

Monday, May 19, 2014

How to Adapt a Recipe

I'm incapable of following a recipe the way it's written... at least when it comes to cooking, baking is a WHOLE other story (ie I'm terrified of messing baked goods up. Cooking I do by feel, Baking I do by checking the directions every 20 seconds). I'll see something that looks good and then instantly start adapting it to fit my needs and my tastes. That's one reason why I always feel awkward when people ask for my recipes... I don't have it written down. I have the original recipe and I can try to lead you down the path of changes that my mind made, but it's hard to do.

This last Saturday I had the chance to throw a party for a great cause (Outnumber Hunger) as sponsored by houseparty.com (love these parties). In the box of goods I was given there were a couple of different starter recipes included. I took them and ran my own way- and that way lead to real deliciousness. Recipe #1 was originally a Strawberry Yogurt Torte that I twisted and turned into a Blackberry Yogurt Cake. Recipe #2 was a Lemonade recipe (I found it online) that I morphed into a Triple Citrus Lemonade. I unfortunately didn't get a picture of the lemonade- mostly because it disappeared too quickly.

So, how did I morph these? I went off of what I already had on hand. For example, I had no strawberries, but I've slowly been stockpiling blackberries while they're on sale and sticking them in my freezer for months now. Plus, I knew it would add a nice sweet but slightly sharp note to the cake. I don't like frosting even the tiniest bit, but I had cream cheese and I can usually tolerate cream cheese frosting, so I searched for 'blackberry cream cheese frosting' and came up with this gem which I then adapted to my needs.

With the Lemonade, I cheated. I've had recipes like this before at the Gardener's Market in Logan, Utah (I miss that place), so I knew what flavors I wanted to aim for. I tried to balance the tart lemons, the little bit of sweet in the key limes, and the ultra sweet in my orange.I loved the idea of the simple syrup in the original recipe, so I instantly chose that one.

In conclusion, don't be afraid to make up crazy sounding things and then looking for them online. Chances are someone's had a similar idea you can adapt to your purposes. Also, go crazy. Sometimes the most insane sounding combinations can be the best. Lastly, you never know until you try! I've had my share of failures, and so will you. THAT'S OK. That's what the kitchen is made for- experimenting. Have fun and enjoy!

Blackberry Yogurt Cake with Blackberry Cream Cheese Frosting

Cake:

1 box Betty Crocker Super Mist White Cake Mix
3/4 c Water
1/3 c vegetable oil
3 egg whites
1 6oz container of Blackberry Yogurt (try to get fat free)

Frosting:

1 stick butter (room temperature)
4 oz. cream cheese (softened)
3/4 C fresh blackberries (I used 1 1/4 pints)
2 C confectioners sugar (or to taste)

Preheat oven to 350. 
Beat ingredients together on low speed for 30 seconds and high for 2 minutes. Pour into pan.
Bake for approximately 20-30 minutes depending on pan size, remove when toothpick poked in comes out clean.
Cool 10 minutes, remove from pan, and then let cool for another 2 hours.

Then, beat butter and cream cheese together until fluffy. Add blackberries (I smashed them a bit first). Beat until mixed and then slowly add sugar 1/2 cup at a time until incorporated fully. Taste and add more sugar as needed (some blackberries are more tart then others).

Frost cake and put in fridge for roughly 20 minute to set the frosting (you can skip this part, it just makes it less messy when serving and eating). Enjoy!

Not the prettiest picture, but BOY was it GOOD!

Triple Citrus Lemonade

1 3/4 c granulated sugar
1 1/2 c citrus juice
8 c water

Pour one cup water and sugar into a small sauce pan. Bring to boil and stir to dissolve. Take your simple syrup off of the heat and let mixture cool to room temperature. Cover and place in fridge until ready to use. 

Squeeze your citrus. I used one small bag of key limes (24 I believe), 8 lemons, and 1 navel orange. Strain out pulp and seeds (I used a cheese grater).

Mix juice, simple syrup, and remaining water in a large pitcher and chill into ready to serve,


Saturday, May 17, 2014

Adovia Dead Sea Mud Soap Review

Disclosure: I got this product as part of an advertorial.
image obtained from website


About the product

Here are some quick facts about Adovia Dead Sea Mud:
  • Removes dirt and cleanses your skin, while simultaneously infusing it with minerals essential to keeping your skin hydrated and moisturized
  • Enriched with century old Dead Sea mud, leaving your skin cleansed and nourished
  • Contains an unique combination of Dead Sea minerals derived from Dead Sea Mud
  • 100% all natural moisturizing soap
  • This soap has also been found effective at relieving acne
My thoughts

When I first saw the soap, I actually loved the color of the soap. I loved the concept of using Dead Sea mud as soap because I have read about how the Dead Sea mud is very healing.

The soap has a light fragrance which I was happy about because some soaps are so overpowering with perfume. I decided to use the soap while I took a shower. I used the soap on my entire body. When I was done showering, I instantly could tell how my skin was different. My skin was softer and felt so smooth. And I loved how the soap didn't leave any grim or film on my skin.

Sometimes I battle with dry and cracked skin and this soap helped soften those spots. I have used this soap for several weeks, and I haven't had any bad reactions. My skin feels healthier and looks more vibrant. I'm totally in love with this soap!


I received one or more of the products mentioned above for free using Tomoson.com. Regardless, I only recommend products or services I use personally and believe will be good for my readers.