Friday, February 28, 2014

Baby Shower Giveaway!!!

Amy from This Mamas Life is expecting a little bundle of joy! What a better way to celebrate than to offer a great Baby Shower Prize Package to our readers!

                                           Baby-Shower-button


Hosted By: This Mamas Life & Anderson's Angels
Co Hosted By: Mama on A Green Mission, More is Merrier, Howling Horns, Budget Earth, and Mama Pure.
  Baby-Shower-Giveaway-Sponsors


Value: Over $1500.00 in Prizes! (We are still adding prizes) 
 Pretty Pushers - Labor & Delivery Gown, Postpartum Undies & Nursing Pads - $90 Value 
Glow Bugs Diapers - 1 Diaper Boy/Girl/Neutral - $12.50 Value 
AuraWeavers - Swaddle Blanket - $20 Value  
Buttons Diapers - 5 Covers, 5 Liners and Large Wet Bag - $90 Value
Aveeno Gift Set - $ 29 Value 
Fair Haven Health - Doppler & DreamBelly Butter & Cream - $61 Value
Bada Boum - Sleep Sack - $47 Value 
Tommee Tippee -3 Pack of Bottles - $20 Value 
Project Pomona - Your choice of Item up to a $34 Value 
The Children's Place - Gift Card - $50 Value 
Pediped Shoes - $30 Value Tortle - $20 Value 
Kushies - Layette Set - $15 Value 
Svan Totseat - $35 Value 
Joovy Nook Highchair - $149 Value 
Crane Humidifier - Either the Drop or Adorable Animal Style - $45 Value
Ubbi Diaper Pail - Diaper Pail in your choice of color - $80 Value 
Wink Shapeware - $54 Value 
Miracle Blanket - $30 Value
Baby Breeza - Original Processor - $99 Value 
**More Sponsors May Be Added **


*One Lucky Reader will receive the items shown above ( $1500.00 Value)
*Giveaway starts March 1, 2014 at Noon est.
*Giveaway will end at 11:59pm est on March 22, 2014
*Giveaway is open to US only * You must be 18 or over to enter
* Winner will be chosen at random via Rafflecopter
* Winners will have 48 hours to respond before a new winner will be chosen.
* The lucky winner will be notified by email at the end of the Giveaway.
* MI Savings Mama and the other participating blogs are not responsible for prize shipment or fulfillment

  a Rafflecopter giveaway

 Disclosure: MI Savings Mama received the items above in exchange for review. This blog did not receive financial compensation or product in exchange for this giveaway. Facebook, Twitter, & Pinterest are in no way associated with this giveaway. Prize fulfillment and shipping will be handled by the Sponsors.

Thursday, February 27, 2014

Baby Shower Twitter Follow Page


Tuna Fish Sandwiches

My family loves sandwiches. They are so versatile and usually relatively easy to make. However, I don't like eating the same things over and over again. So I am constantly finding new ways to make food. My husband found this recipe for tuna salad (Barbie's Tuna Salad) and decided to do tuna fish sandwiches. This was unusual since we aren't really big into tuna fish. I am so glad he made this salad since it is now one of our favorite sandwiches to make!


Tuna Salad
*makes about 6 large sandwiches
*this recipe has been slightly altered and is only a little bit different than Barbie's Tuna Salad (we only changed the amount of minced onion, garlic powder, and used a little bit more tuna)

Ingredients:
  • 3 (5 oz) cans of tuna, drained
  • 12 tablespoons (3/4 cup) mayonnaise or miracle whip
  • 2 tablespoons Parmesan cheese
  • 6 tablespoons sweet pickle relish
  • 1 tablespoon dried minced onion
  • 1/2 teaspoon curry powder
  • 2 tablespoons dried parsley
  • 2 teaspoons dried dill weed
  • 1/4 teaspoon garlic powder
Steps:
  1. In a large bowl, combine the tuna fish, mayonnaise, and sweet pickle relish
  2. In a small bowl, mix together the Parmesan cheese, dried minced onion, curry powder, dried parsley, dill weed, and garlic powder. 
  3. Add the dry ingredients to the tuna mixture.
  4. Mix well.
  5. Wash a couple leaves of lettuce.
  6. Assemble the sandwich and enjoy!

Pictures
Here are two pictures so you know what type of tuna fish I used and what the tuna salad looks like when it is all mixed up. Seriously, I can eat the tuna salad by spoonfuls!


Now that I have finished this post, I'm going to make some tuna fish sandwiches for lunch again. I just love curry powder. Let me know your thoughts about this recipe when you try it!

Wednesday, February 26, 2014

Journey to Rainbow Island Review & Giveaway

I love reading fantasy so when I saw, Journey to Rainbow Island, was available, I wanted to read it. The book cover is absolutely beautiful and really captivated my attention.


About the book:

Series: Journey to Rainbow Island Book 1
Age: Middle Grade
Genre: Fantasy adventure

Journey to Rainbow Island features Yu-ning, a girl of 11 years, who lives on Rainbow Island. This island is given this name because a rainbow, powered by the Seven Sacred Stones, is always over the island. However, the peace and beauty of this island is destroyed when an obsidigon, a black dragon, destroys many buildings in the village, takes her best friend, and takes the seven sacred stones. Darkness begins to creep into Rainbow Island's world of light.

Yu-ning discovers her special heritage and  learns about the past war with the obsidigons.She learns that a dark wizard, Hobaling, conjured the obsidigon in order to gain more power and so darkness will reign.  Yu-ning then embarks on a dangerous journey to find a long lost weapon that can defeat the obsidigon in hopes that she can rescue her friend and recover the Seven Sacred Stones. She is not alone during her journey since she is aided by her mentor, Metatron, and her animal friends, Suparna and Magic.


About the author:
*image obtained from her website

Christie Hsiao is the founder of Serenity Media Group, a global entertainment company devoted to creating high quality film, TV, and digital media projects. It is her vision to create positive entertainment that is uplifting, international in scope, and that catalyzes change. Christie believes in the unique power of story to raise awareness and to compel societal transformation. Originally from Taiwan, she holds a BA from UCLA in East Asian Studies and an MBA from Pepperdine University. Christie went on to study film in New York City, where she wrote, directed, and produced several well-received films before starting her own company. Journey to Rainbow Island is her first novel.


My thoughts:

For a first time author, I think Christie Hsaio did a relatively good job. Yu-ning's world is exciting, full of vibrant colors, and beautiful, and I loved the provided maps and illustrations. It is a place where I would love to go! I also feel that this book would be great for young teenagers because it teaches about courage, love, and staying true to yourself.

This is a great book for those who don't like a lot of violence or scary imagery. The story does a great job teaching you that light exists in everyone and that it is your choices that brings the darkness into your heart. I liked how the book focused on love being the true weapon to defeat darkness. If you need a positive book, then this is a must read.

However, there are a few things that I didn't like about the book. I felt that there wasn't a lot of character development throughout the book. Yu-ning had the same philosophy and attitude through most of the book. Her faith and love never wavered (well, there were a few times it did, but it was like a paragraph length of doubt).  I wanted to read about a character who struggled and still won in the end. So I didn't get really into the characters because I just didn't relate to them. Also, there were several times where there were some redundancies in the description which kind of annoyed me. For example she would say, "black obsidian".

Overall, I enjoyed the book and I would probably give the next book a shot because I'm curious to see how things end. I probably wouldn't reread it over and over like some other books I have.

Giveaway:
You have the chance to win a copy of Journey to Rainbow Island! This giveaway will run from February 26 and will end on March 4 at 11:59 pm MST. The winner will have 48 hours to respond before a new winner will be chosen.


Can't wait to get a copy of this book? Then head on over here to purchase it! Want more information about this book? Then head on over to the author's site.

*Disclosure: I received the book mentioned in this post at no cost in order to do this review. All opinions are my own. Howling Horn is not responsible for prize shipment to the winner as this is a sponsored giveaway.

Tuesday, February 25, 2014

Fabulous, Fishy, Letter 'F' Day

As I approached this week’s Calendar Time, I decided to focus on not just learning the letter and sound, but also working on some motor and matching skills.

First, we matched Big ‘F’ and Little ‘f’.
Materials used were: foam with sticky backs, white printer paper, scissors, and a permanent marker. I cut some of the foam into the shape of a tree, stuck it on the white printer paper, cut out some circles to be our fruit, and then used the marker to write the Big ‘F’ on one half  of the tree and the Little ‘f’ on the other half and then wrote some on the fruit. BooBoo Bear liked this activity, though I’ll admit he spent much of it trying to match colors and stack them on top of each other.

When I told him to look at the letters instead he did much better at the activity and really got into it. I would definitely recommend doing this for a child slightly older than he is (3-4).


Then, we went fishing!
Materials needed: felt, permanent marker, wooden rod, twine, paper clips, scissors, magnet, and needle and thread (optional).
I folded the felt sheets in half and then drew the outline of a fish with the tail ending at the fold. I then cut the shape out but didn’t cut the end so there were two fish connected by the tail. Then I wrote a Big ‘F’ on one side and a Little ‘f’ on the other. If I did this again I’d either stitch the letters on OR glue printed letters onto the felt, I think it would look better. Then I stitched up the side of the fish until I reached the middle, inserted a paperclip into the ‘mouth’, anchored it there with some stitches, and then sewed the rest of the fish up. If you aren’t skilled at sewing or simply don’t have the time, you can just slip the paperclip over the moth area to secure the fish together. I do recommend still having the two sides so that the paperclip is fastened securely on.  Lastly, I attached a magnet to twine and then tied the twine on to a wooden rod we had lying around our house from another project.


'Look Ma! It's a big one!'
BooBoo LOVED this one. So much so that I’m planning on extending his collection of things to catch in the coming weeks. I’m thinking boots, octopi, crabs, clams, robots, rockets… the possibilities are endless!

Afterwards we worked on writing out the letters.
Given his age, I knew this was a long shot, but he loves coloring so I went with it anyways.
Look at how he's holding his crayon! It took me until I was in 2nd grade to perfect that grip!
This is being added to all of our future Calendar Time activities. Did he do it right? No. But he tried and he’s recognizing the letter out of context (on random boxes in the house) so I think it’s completely worth the extra time.
 
Some of the F's BooBoo wrote. The top purple one was with help, but the other two were all him... as are the scribbles he produced right after (they are far easier to make after all) 

All-in-all, it was really successful. I love the one on one time I get with BooBoo when we do these and he's really loving learning. He’s still having fun with the matching game from our ‘D’ week and I know we’ll continue using the fishing game for a long time to come.

Monday, February 24, 2014

Cardboard Box Guitar

While planning my week of letter "G" (which will be posted next week), I came across this cute pin about making a cardboard guitar by Minieco.co.uk. I knew I just had to do this on music day because it would be a great interactive way to teach about music and guitars!


The original post was pretty self explanatory with lots of pictures. When I mentioned I was going to do this with Moneky, my husband got really excited. And, I mean REALLY excited. He ended up taking over the project because he wanted to make a really cool guitar. I should mention that he used to make guitars so I guess this explains his enthusiasm with making a cardboard box guitar. He told me that he hasn't made one before, and he NEEDS to make one.

Step 1
Find a cardboard box lying around the house. I used a generic white cardboard box that a lot of electronic parts come in (this means that the lid folds into the box unlike a shoe box where the lid sits on top). If you do use a shoebox, then you will have to design the guitar a little bit differently


Step 2
Pick out some scrapbook paper to decorate the box. I have tons of scrapbook paper at my place since I love to scrapbook. I picked out paper that I knew Monkey would love: trains, vehicles, and blue!

Step 3
Cut a circular hole in the middle of the box. The sound hole should be proportional to the size of the box. We cut out a 2.5 inch wide circle because the box we used was 9.5 x 6  x 2 inches.


Step 4
Glue the paper onto the box. We also glued paper inside the box so when you look through sound hole of the guitar, it looks festive.


Step 5 (optional)
Make a pickguard for the guitar. My husband wanted a pickguard on the guitar so he sketched a template out, and he made it from the blue scrapbook paper. This is just for decoration, but it made the cardboard box guitar look awesome!

Step 6
Create a raised bridge for the guitar. The raised bridge is needed to get better sounds from the guitar. My husband made the raised bridge by cutting a 3 inch piece from a 5/16 dowel. He mentioned that you can use anything roughly the size of a pencil.We then glued blue scrapbook paper on it so the raised bridge would match the theme of the guitar.


Step 7
Attach rubber bands onto the cardboard box guitar using thumb tacks.You can use as few as 3 rubberbands and as many as 12, but we did 6 because regular guitars have 6 strings. Cut the rubber bands and tie a knotted loop on one end of the rubber bands. On the end of the guitar box, put the thumb tacks in a straight line. These thumb tacks will hold the knotted loop of the bands. We spaced the thumb tacks 3/8 of an inch apart. On the opposite end of the guitar box, put 6 more thumb tacks. On this end, you can tune the strings by adjusting the tension to the desired pitch.


Thoughts
This was a way fun project. My husband went overboard in doing this cardboard box guitar, but I was okay with that. We had fun spending time together. You can still make a great cardboard box guitar without all the technical part that my husband did. Once again, his sculptor side surfaced. And, this guitar was a hit with Monkey! This was a perfect way to teach about guitars.


I definitely want to make more cardboard instruments in the future since Monkey really loved his guitar!!

Friday, February 21, 2014

Copycat

This week has just been awful! Things have not gone as planned, and my mood has been so despondent and sad. And as I thought about what I wanted to write for this post, I decided I needed to do something that will make me smile and hopefully you as well!

When Roo was born, I only thought about how he would want to do everything Monkey does. And, of course, I was right. Roo loves watching Monkey, and loves to try to follow him around.


It never even crossed my mind that Monkey would want to copy what Roo was doing. And, yes, when Roo was born, I made sure to spend alone time with Monkey so he wouldn't be forgotten. Anyways, Monkey loves to watch and do what others do. I just never thought he would copy his younger brother.

Story 1

Roo loves to be wrapped up tight in his blanket. He loves to cuddle. After Roo was born, Monkey watched intently as I would swaddle Roo. A few days after getting home from the hospital, Monkey started wrapping up his stuffed animals in blankets and tucking them into bed. My heart melted when I saw Monkey copy me by swaddling his bear.


Monkey prefers to be "rolled" which means he likes the blanket wrapped completely around him. Now, I wrap up two boys for nap times and bed times.


Story 2

I use a high chair to keep Roo busy while Monkey and I eat. One day after Monkey and I finished our meal,  I took Roo out of the high chair, and we went into the living room. Monkey didn't follow, and I heard some ruckus in the kitchen. I decided to go investigate. To my surprise, Monkey was sitting in the high chair, and he managed to lock the tray in place. He proceeded to "play" with a few toys. I couldn't stop laughing. Monkey was pleased for a few minutes until he realized being confined to the high chair really wasn't as much fun as he thought it would be.


Story 3

I like to take pictures. I'm not a photographer, but I love looking at pictures and seeing how my family has changed over the years. Plus, I love to scrapbook. The other day I thought I put up my camera, but I was wrong! I don't like to leave it out since Monkey is VERY curious and really wants to play with it. I left the room to go grab something, and I heard a noise that sounded very much like my camera. And, of course, the noise was indeed my camera. Monkey found my camera and decided to take pictures. So here are two pictures that he took. I couldn't delete them because the pictures remind me of how he wants to be like me.


What ways do your kiddos copy each other? And how do they copy you?

Thursday, February 20, 2014

Mini Terriyaki Shepherd's Pies

Alright, I know the name of this sounds insane. Terriyaki? Shepherd’s Pie? Yup. And it works. This is one of those recipes that just hit me as I was attempting to figure out what to make for dinner one night. “Wait… what if I took our love of Asian ingredients and combined them with my husband’s love of potatoes? What if they came in a nice little package? Wait! I can use our muffin tin!"

 It wasn’t until I sent this out to testers (super good friends who are game for anything food-wise) that I realized the similarities to Shepherd’s Pie and decided to roll with that when it came to giving these tasty little buggers a name.

I’ve now made this recipe four times and it’s been a hit each and every time. My son eats seconds and my hubby often reaches for thirds. My testers tried this on a 6 year old, a 3 year old, and two 1 year olds and reported back that they were a hit with all of them (minus the 3 year old who doesn’t like potatoes, she still liked the meat apparently).The awesome part about this recipe? It makes it's own gravy. Yup. And it's delicious. There are a few tricks to making sure the gravy doesn't cook off and I share them with you below.

You can choose to increase the garlic and ginger (I think it would be amazing bumped up a bit) but I kept the amount low in order to appeal to more palates.

All the ingredients lined up and ready to go
My secret- DARK Soy Sauce. It adds a depth of flavor that' you can't find in regular soy sauce . This one was found in an Asian Foods shop in Salt Lake City, Utah and brought to me by my awesome mother


As the patties cook they WILL shrink, so make sure to cover the entire bottom of the tin and contour the edges a bit so they make a cup. This helps the gravy to form and not disappear before eating time.

Mmmm. Little meat cupcakes. Note how the potatoes are stacked on top, but don't quite go over the edges.

Served up and ready to eat. See the gravy on top? Yum


Mini Terriyaki Shepherd’s Pies
6 medium potatoes
6 T butter
½ c milk
Salt and pepper to taste
1 lb ground Turkey meat
½ tsp diced garlic
2 tsp soy sauce (dark is optional
2 tsp Terriyaki sauce
¼ tsp ginger
¾ tsp paprika
Cut potatoes into slices, put in large pot, add water to fill ¾ of pot put on heat and bring to a boil. Boil potatoes until consistency needed to mash.
 Meanwhile mix turkey, garlic, soy sauce, teriyaki sauce, ginger, and paprika in bowl. Form into a cup shape in bottom of cupcake tin (any size works). Pop in oven warmed to 350 for 8 minutes. Meanwhile, make the mashed potatoes. Pull meat out of oven. If you’re using a small cupcake tin you’ll notice the gravy is on top of the patties. Simply use a spoon to tip the patties a bit so that the gravy goes back underneath (this step insures that the potatoes won’t sop up the gravy during the next step). Spoon potatoes on top of the patties so that you can’t see the patties or the bottom of the tin. Now pop in the oven for about 10 minutes or until the potato tips start feeling firm. When you serve them, use a spoon to pull them out, then spoon the gravy at the bottom over the potatoes. 

Let me know when you make it and what changes (if any) you make! Enjoy!

Tuesday, February 18, 2014

A Week of Letter "E"

I have to say that Monkey and I just love doing preschool learning activities. I feel that the preschool lesson template I have created is working really well for us. It helps cut down on my planning time, and it helps us to learn about many subjects during the week. Here is my free preschool outline that I use to plan each week.

I hope you have fun teaching your kiddos about the letter "e"! And, here is my preschool letter "E" lesson plan that I wrote when I planned my week of "e" learning activities.


Monday - Reading

Monkey loves doing the letter of the week projects! He loves gluing, cutting, and creating a letter to hang up on the wall. This blog, Crystal & Co., has great ideas for letter of the week projects. I really loved the idea of making an eagle out of the letter "E".


After we finished making the eagle, we sat down and read books that feature the letter "E" such as My "e" Book, Horton Hatches the Egg, Green Eggs and Ham. Monkey loved the books this week because this week contained many of his favorite books! He just loves eggs and elephants.

We finished the day by learning how the letter "E" is made and what sound it makes. I taught Monkey how to make the letter "E" by using our play dough letter cards. The website, makinglearningfun.com, has a myriad of activities to teach many different subjects. Plus, they provide free printables!


Tuesday - Science

Today was a really fun day, and Monkey talked about it all day long! We used eggs and did a game of "will it sink or float". I knew how to do this activity because of my science background, but go to Science Kids for directions on how to do the floating egg experiment. I used two glass bowls that I had in the house. I filled one up with regular tap water, and the other one I placed about 9 tablespoons of salt in it before filling it up with water.


Monkey was very intrigued with what we were doing. I had him drop the egg in each bowl, and we watched what happened. He was very excited how one egg floated and the other egg sunk. I then pulled out the floating egg and placed in the the bowl with regular tap water. I did this to teach him that nothing was different about the "floating egg". Then we transferred both eggs into the salty water and observed how they floated. We concluded the activity by pouring regular water into the salty water bowl and watched as the eggs sink to the bottom.


Even though Monkey probably doesn't understand density at this point, I feel he learned about examining all angles of a problem. We will definitely revisit density again, and do even more projects with it!

We finished the day by doing the "Discovery Bag". Monkey just loves this activity. This is a bag filled with objects that start with the letter "E". I labeled each word (for example: Elephant) so Monkey will learn to connect the letter "E" with the words that start with "E". We talked about where each item can be found, and we tried to discover more "E" words around the house. I guided Monkey along this activity since he is only 2 years old. We talked about where eggs are found: in the fridge, in the store, and from the farm. 


He loved discovering what words start with the letter "E". As Monkey pulled the objects out from the bag, I made sure he said the word while I showed him how the word starts with the letter "e".

Wednesday - Math

Another day to practice counting and sorting. I wanted to do something different, and I was way excited to find the blog, The Measured Mom. She has an entire page for letter "e" math connections, and she provides free printables!

Because Monkey loves eggs, I knew he would like an activity where we could count eggs. I printed off her nests (mine aren't cute like hers since I don't have a colored printer), but the numbered nests did their jobs. I used pom pom balls as the "eggs", and I helped Monkey add the correct number of eggs to the numbered nest.


Then, I had him order the pom pom balls according to size. I wanted him to practice identifying sizes by ordering the "eggs" from smallest to biggest and biggest to smallest. He actually did pretty good at this. However, I plan on making this activity more challenging by having more than 3 to order the next time around.

Thursday - Art

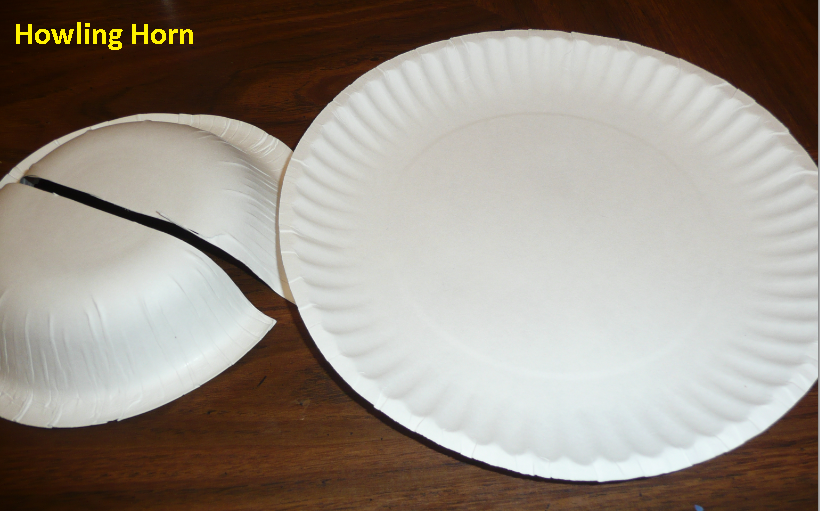
Monkey is obsessed with painting. So I wanted to find a fun painting activity with an elephant. I came across this paper plate elephant project by the Crafty-Crafted. I thought it was so adorable. I changed a little bit on how it was done so it would become a painting project instead. I got one paper plate and one paper bowl. I cut the paper bowl in half so they would be the right shape for the elephant's ears. Then, I had Monkey pick out the colors he wanted to paint the elephant. While he painted, I talked to him about elephants and told him 3 facts. The facts can be found on my preschool outline.


After the paint dried, I glued the eyes and ears on the paper plate using a hot glue gun (Monkey wasn't allowed to help out on this one). I helped him make the accordion style nose, and then I helped me glue the nose on using a glue stick.


Friday - Physical Exercise

We can't wait for the weather to start getting warmer so we can do more activities outside! Because we have snow on the ground, it is hard to do some physical exercise activities. Anyways, we tried doing an elephant walk today. We did this by walking on all four limbs. I must admit that it was really comical, and Monkey thought it was hilarious to stop and quickly run to me and push me over. At least we had fun doing something different today.

Saturday - Music

As you can tell from my previous posts, we love Story Bots. These songs really work because they get stuck in your head, and I end up singing them throughout the day with Monkey. Story Bots has a really cute video about the letter "E".

Then, I taught Monkey about the instrument, euphonium. I did this by using a video that showed the instrument being played.

Sunday - Religion

Today, Monkey learned about the prophet Elijah. His story is found in the Old Testament of the Holy Bible. I read a few scriptures about Elijah, showed him a picture of Elijah from this gospel art book, and then we watched The Animated Stories From The Bible - Elijah. I talked with Monkey about the importance of following God and recognizing His power.

Want more ideas on how to teach the alphabet? Check out these posts on the following letters:
Letter A
Letter B
Letter C
Letter D